
Due to the volatile nature of crypto markets, real-time data is important for making informed decisions. In this guide, we’ll walk through how to build a serverless solution using Azure Functions and the CoinGecko API to fetch real-time cryptocurrency prices. By the end of this tutorial, you’ll have a scalable, cost-effective setup that can send alerts based on price thresholds. Let's dive in!
Why Serverless?
Serverless computing is particularly advantageous for cryptocurrency solutions due to several key reasons.
Cost Efficiency: By adopting a serverless model, you only incur costs for the actual compute time your functions use. This pay-as-you-go approach will help you save significant costs, especially during periods of low activity. This is particularly beneficial for applications that monitor real-time cryptocurrency prices, where demand can fluctuate.
Scalability: Serverless infrastructure are developed to automatically scale up or down based on the current demand. This means you don't have to manually manage infrastructure to handle sudden spikes in traffic, which are common in the highly volatile crypto market. Whether there’s a surge in user activity or a drop, the system adjusts seamlessly to maintain optimal performance.
Maintenance: With serverless computing, the cloud provider manages the underlying infrastructure, including updates, patches, and capacity planning. This allows you to focus entirely on developing and deploying your code, without the overhead of server maintenance. Consequently, you can concentrate on enhancing the functionality and user experience of your crypto solution.
These advantages make serverless computing an ideal choice for developing dynamic, responsive, and cost-effective cryptocurrency applications. By leveraging real-time data processing and event-driven architecture, serverless solutions can effectively respond to rapid market changes and deliver timely alerts and insights to users.
Prerequisites
Before we begin, ensure you have the following:
Azure Account
Sign up at Azure Portal. Ensure your Azure account is active and you have the necessary resources.
Terraform
Download from the Terraform website. Follow the instructions specific to your OS and verify the installation by running terraform -v.

Visual Studio Code (VS Code)
Download and install the Visual Studio Code from the website. Keep it updated to access the latest features and extensions.
Azure Functions Extension for VS Code
Install this extension from the Extensions view in VS Code to easily create, debug, and deploy Azure Functions.
Azure CLI
Download from the Azure CLI website. Install it and sign in using the az login command.
.NET Core SDK
Download from the .NET download page. Install it to build and run .NET applications.
CoinGecko API Key
You'll require a CoinGecko API key to access real-time cryptocurrency prices. The free Demo plan is sufficient for our use-case.
Postman
Download and install from the Postman website. Use Postman for testing APIs to ensure they work as expected.
By ensuring these prerequisites are met, you'll be well-prepared for setting up and deploying your serverless solution for real-time cryptocurrency price alerts.
Setting Up Terraform CLI
To manage your infrastructure with Terraform, you need to set up the Terraform CLI on your local machine.
- Go to the Terraform download page and install the appropriate Terraform package for your operating system. For macOS, you may use Homebrew:
brew install terraform - Open your terminal and run
terraform -vto verify installation. This should display the installed version of Terraform.
Managing Terraform State
Terraform utilize a state file to keep track of the cloud resources it manages. This state file is important for Terraform to maintain the current state of your infrastructure.
- Local State: By default, Terraform stores the state file locally in your project directory. This is suitable for small projects or individual use.
- Remote State: For larger projects or team environments, storing the state file remotely (i.e. in an Azure Storage Account) is recommended to enable collaboration and state locking.
Terraform Commands
-
terraform init:Initializes a Terraform configuration. It sets up the backend and installs any required providers. -
terraform plan:Creates an execution plan, showing Terraform's actions to achieve the desired state defined in your configuration files. -
terraform apply:Executes the actions generated in the plan to create, modify, or delete resources.
Step 1. Provisioning Azure Resources with Terraform
To provision the necessary Azure resources more effectively, let's expand the Terraform configuration. We'll add missing configurations and set up environment variables to read details from environment files.
First, create a Terraform configuration file (main.tf):
provider "azurerm" {
features {}
subscription_id = "YOUR_AZ_SUBSCRIPTION_ID"
}
terraform {
backend "azurerm" {
resource_group_name = "rg-realtime-crypto-alerts"
storage_account_name = "stgrealtimecryptoalerts"
container_name = "tfstate"
key = "terraform.tfstate"
}
}
resource "azurerm_resource_group" "crypto_rg" {
name = "rg-crypto-alerts"
location = var.location
tags = var.tags
}
resource "azurerm_storage_account" "crypto_storage" {
name = "stgcryptoalerts"
resource_group_name = azurerm_resource_group.crypto_rg.name
location = var.location
account_tier = "Standard"
account_replication_type = "LRS"
tags = var.tags
}
resource "azurerm_service_plan" "crypto_plan" {
name = "asp-realtime-crypto-alerts"
location = var.location
resource_group_name = azurerm_resource_group.crypto_rg.name
os_type = "Linux"
sku_name = "Y1"
tags = var.tags
}
resource "azurerm_function_app" "crypto_function_app" {
name = "func-realtime-crypto-alerts"
resource_group_name = azurerm_resource_group.crypto_rg.name
location = var.location
storage_account_name = azurerm_storage_account.crypto_storage.name
storage_account_access_key = azurerm_storage_account.crypto_storage.primary_access_key
app_service_plan_id = azurerm_service_plan.crypto_plan.id
os_type = "linux"
site_config {
linux_fx_version = "DOTNET|6.0"
}
app_settings = {
"WEBSITE_RUN_FROM_PACKAGE" = "1"
"COINGECKO_API_KEY" = "<your_coingecko_api_key>"
"GMAIL_PASSWORD" = "<your_gmail_password>"
"ALERT_EMAIL" = "<your_gmail_id>"
}
tags = var.tags
}
Create a file named variables.tf to define the variables:
variable "location" {
description = "The Azure region to deploy resources."
type = string
default = "Australia East"
}
variable "tags" {
description = "Tags to apply to resources."
type = map(string)
default = {
environment = "production"
application = "RealTimeCryptoAlerts"
}
}
Create a file named terraform.tfvars to set the values of these variables:
location = "Australia East"
tags = {
environment = "production"
application = "RealTimeCryptoAlerts"
}
Creating an App Password in Gmail
- Sign in to your Google Account.
- Go to Security in the navigation panel.
- Under "Signing in to Google," select App passwords. (If you don’t see this option, ensure 2-Step Verification is turned on).
- Select the app and device you want to create the app password for.
- Click Generate.
- A 16-digit app password will appear. Use this password instead of your regular account password for the specific app.
Step 2. Creating Initial Resource Group and Storage Account
1. Create the Resource Group
First, we need to create the resource group where the storage account will reside. Open your Azure CLI and run the following command:
az group create --name rg-realtime-crypto-alerts --location "Australia East"This command will create a resource group named rg-realtime-crypto-alerts in the Australia East region.
2. Create the Storage Account
Next, create the storage account within the newly created resource group. Run the following command:
az storage account create --name stgrealtimecryptoalerts --resource-group rg-realtime-crypto-alerts --location "Australia East" --sku Standard_LRSThis command creates a storage account named stgrealtimecryptoalerts in the rg-realtime-crypto-alerts resource group with locally redundant storage (LRS).
3. Create the Storage Container
Finally, create a storage container within the storage account to store the Terraform state file. Run the following command:
az storage container create --name tfstate --account-name stgrealtimecryptoalertsThis command creates a storage container named tfstate in the stgrealtimecryptoalerts storage account.

Step 3. Initializing and Applying the Terraform Configuration
Once you have your Terraform config file ready, follow these steps to initialize and apply the configuration:
1. Initialize the Configuration: Run terraform init to initialize the Terraform configuration. This command sets up the backend and installs any necessary provider plugins.
terraform init
2. Plan the Configuration: Run terraform plan to create an execution plan. This command shows what actions Terraform will take to achieve the desired state defined in your configuration files.
terraform plan
3. Apply the Configuration: Run terraform apply to execute the actions proposed in the plan. This command creates, updates, or deletes the specified resources. For example, it will create an Azure Resource Group (azurerm_resource_group), Storage Account (azurerm_storage_account), Service Plan (azurerm_service_plan), and a Function App (azurerm_function_app). This ensures your infrastructure is provisioned and configured according to the defined specifications. Essentially, it brings your desired state of resources into reality within your Azure environment.
terraform apply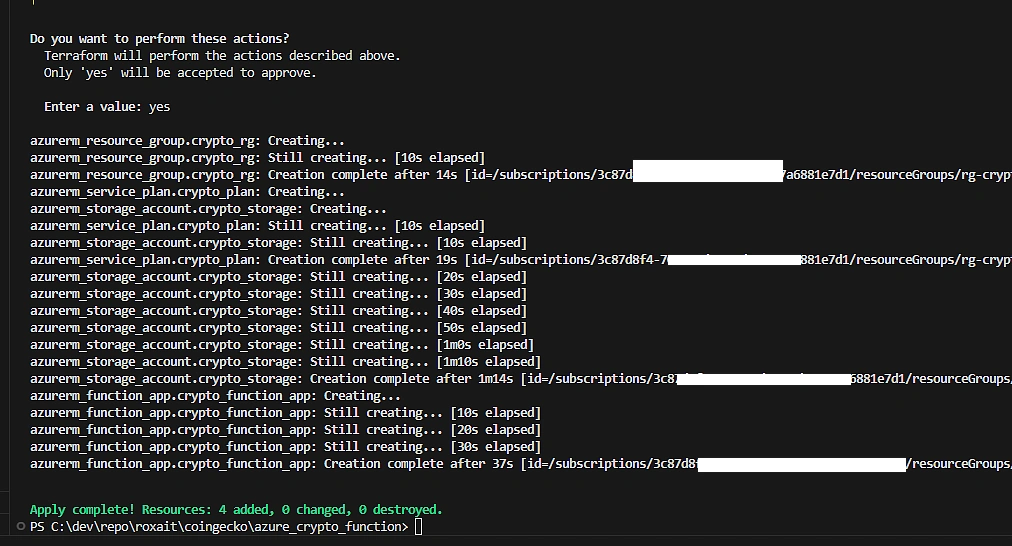
Once you run these commands, Terraform will provision the Azure resources defined in your configuration file. This setup includes creating a resource group, a storage account, and a function app for your real-time cryptocurrency alerts project.
By including variable definitions and environment files (variables.tf and terraform.tfvars), this setup becomes more modular and easier to manage. Environment variables make it simpler to switch between different settings for development, testing, and production environments.
Step 4. Developing the Azure Function in VS Code
Next, we’ll create an Azure Function that interacts with the CoinGecko API using Visual Studio Code.
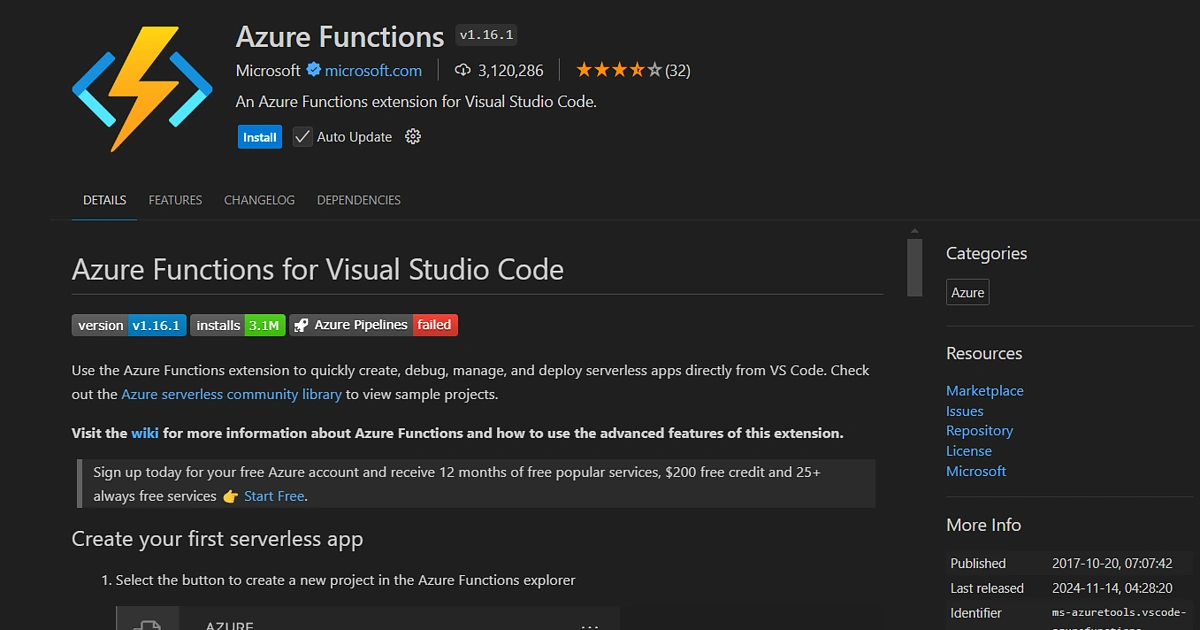
Install the Azure Functions Extension:
- Open VS Code.
- Go to the Functions Extensions view by selecting the Extensions icon in the Activity Bar on the side of the window.
- Search for “Azure Functions” and install the extension.
Create a New Azure Functions Project:
- Open the Command Palette (Ctrl+Shift+P or Cmd+Shift+P on macOS).
- Type
Azure Functions: Create New Project...and select it. - Choose a directory for your project.
- Select a language for your function app (choose C#).
- Select a template for your first function (choose “HTTP trigger”).
- Provide a name for the function (e.g.,
CheckCryptoPrices). - Choose the authorization level (select “Function”).
Install Necessary NuGet Packages:
- Open the terminal in VS Code (Ctrl+or Cmd+ on macOS).
- Navigate to your project directory.
- Run the following commands to install the required packages:
- dotnet add package
Newtonsoft.Json - dotnet add package
System.Net.Http
Implement the Function:
Open the generated Function.cs file (or with the file name you provided). Replace its content with the following code:
using System;
using System.IO;
using System.Net.Http;
using System.Threading.Tasks;
using System.Net;
using System.Net.Mail;
using Microsoft.AspNetCore.Mvc;
using Microsoft.Azure.WebJobs;
using Microsoft.Azure.WebJobs.Extensions.Http;
using Microsoft.AspNetCore.Http;
using Microsoft.Extensions.Logging;
using Newtonsoft.Json;
using System.Collections.Generic;
namespace CoinGecko.CryptoAlerts
{
public static class CheckCryptoPrices
{
private static readonly HttpClient client = new HttpClient();
[FunctionName("CheckCryptoPrices")]
public static async Task<IActionResult> Run(
[HttpTrigger(AuthorizationLevel.Function, "get", "post", Route = null)] HttpRequest req,
ILogger log)
{
log.LogInformation("C# HTTP trigger function processed a request.");
string apiKey = Environment.GetEnvironmentVariable("COINGECKO_API_KEY");
string gmailPassword = Environment.GetEnvironmentVariable("GMAIL_PASSWORD");
string alertEmail = Environment.GetEnvironmentVariable("ALERT_EMAIL");
string responseString = await client.GetStringAsync($"https://api.coingecko.com/api/v3/simple/price?ids=bitcoin,ethereum&vs_currencies=usd&x_cg_pro_api_key={apiKey}");
var prices = JsonConvert.DeserializeObject<Dictionary<string, Dictionary<string, decimal>>>(responseString);
decimal bitcoinPrice = prices["bitcoin"]["usd"];
decimal ethereumPrice = prices["ethereum"]["usd"];
if (bitcoinPrice < 30000)
{
// Send alert email
var fromAddress = new MailAddress(alertEmail, "Crypto Alert");
var toAddress = new MailAddress(alertEmail, "Crypto Alert Recipient");
const string subject = "Bitcoin Price Alert";
string body = $"Bitcoin price dropped below $30,000! Current price: ${bitcoinPrice}\nEthereum price: ${ethereumPrice}";
var smtp = new SmtpClient
{
Host = "smtp.gmail.com",
Port = 587,
EnableSsl = true,
DeliveryMethod = SmtpDeliveryMethod.Network,
UseDefaultCredentials = false,
Credentials = new NetworkCredential(fromAddress.Address, gmailPassword)
};
using (var message = new MailMessage(fromAddress, toAddress)
{
Subject = subject,
Body = body
})
{
smtp.Send(message);
}
log.LogInformation("Bitcoin price dropped below $30,000! Email alert sent.");
}
return new OkObjectResult(prices);
}
}
}

Step 5. Setting the API Key in Azure
To set the API Key in Azure,
- Open the Azure portal.
- Navigate to your Function App.
- Under “Settings”, select “Configuration”.
- Add a new application setting with the names
COINGECKO_API_KEY,GMAIL_PASSWORD,ALERT_EMAILand the value set to your CoinGecko API key, your app password, email id etc.
Step 6. Deploying the Function from VS Code
Sign in to Azure:
- Open the Command Palette (Ctrl+Shift+P or Cmd+Shift+P on macOS).
- Type
Azure: Sign Inand follow the prompts to sign in to your Azure account.
Deploy the Function:
- Open the Command Palette again.
- Type
Azure Functions: Deploy to Function App...and select it. - Follow the prompts to select your subscription, function app, and deployment options.

Step 7. How to Test Your Azure Function Locally
Testing your Azure Function locally is crucial to ensure everything works correctly before deploying it to Azure. Start by installing the necessary tools: the .NET SDK from the official .NET website and the Azure Functions Core Tools using npm with the command: npm install -g azure-functions-core-tools@4 --unsafe-perm true.
Next, set up your local environment variables by creating or updating the local.settings.json file in your project root.
{
"IsEncrypted": false,
"Values": {
"AzureWebJobsStorage": "UseDevelopmentStorage=true",
"FUNCTIONS_WORKER_RUNTIME": "dotnet-isolated",
"COINGECKO_API_KEY": "your_api_key"
}
}
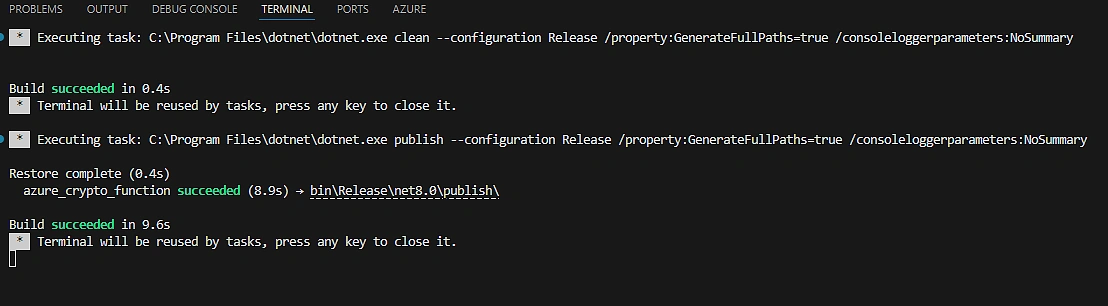
With your environment set up, open a terminal in your project directory. Restore dependencies and start the function by running dotnet restore followed by func start. Once the function is running, use an HTTP client like curl or Postman to send a request, for example, curl -X POST http://localhost:7071/api/CheckCryptoPrices. Monitor the terminal for logs to ensure your function processes requests and returns the expected results. By following these steps, you can confidently test and refine your Azure Function locally.
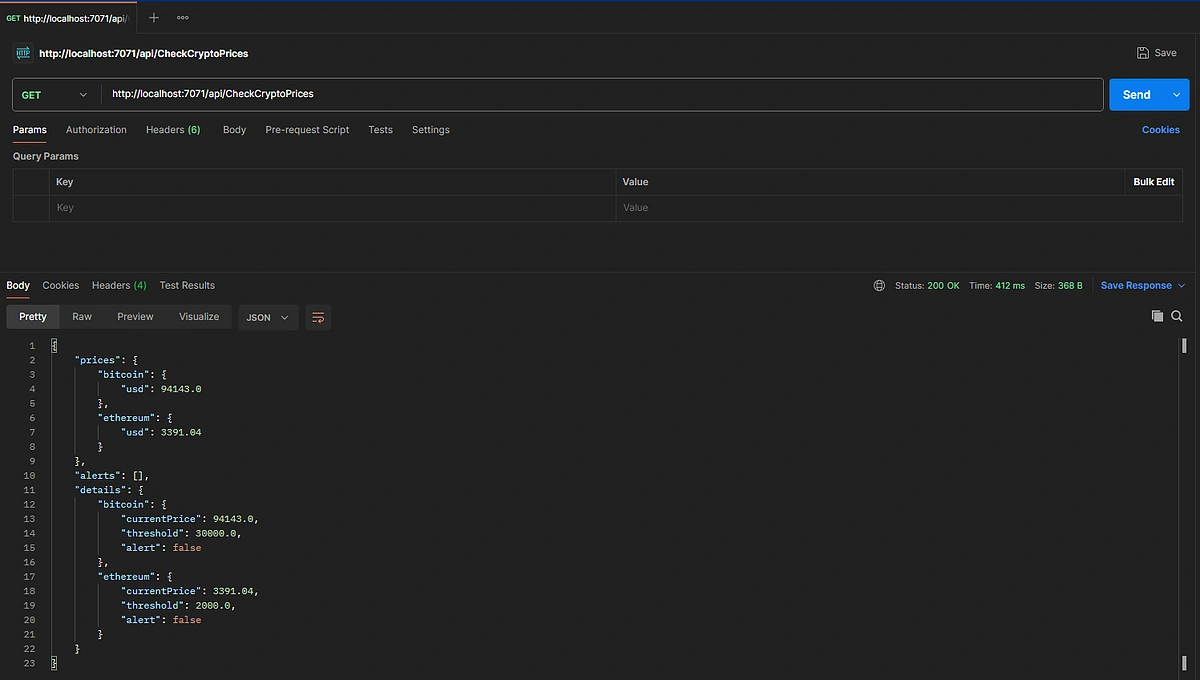
Step 6. Testing with Postman
To ensure your function works correctly, you can test it using Postman:
- Open Postman.
- Create a new GET request.
- Enter the URL of your function:
https://<your-function-app-name>.azurewebsites.net/api/CheckCryptoPrices - Replace
<your-function-app-name>with the name of your function app (i.e.func-realtime-crypto-alerts). - Send the request.
- Check the response: You should see the JSON response with the current prices of Bitcoin and Ethereum.
Step 9. Clean Up Resources
After testing, if you're using Terraform and want to clean up the resources, run terraform destroy to remove the deployed infrastructure. This ensures no unnecessary resources are left running.

Additional Features
To enhance the functionality of your real-time crypto alerts, consider adding the following features:
- User Preferences: Allow users to set their price thresholds and preferred cryptocurrencies.
- Historical Data: Fetch and analyze historical price data to provide insights and trends.
- Multiple Notification Channels: Support multiple notification channels such as SMS, and push notifications.
- Dashboard: Create a web dashboard to display real-time prices and alerts.
Conclusion
Azure Functions is ideal for real-time applications. It enables the fetching of the latest cryptocurrency prices and setting up alerts for specific thresholds, keeping users updated with market trends. Using Terraform for infrastructure management enhances maintainability and reproducibility by defining infrastructure as code. This makes it easier to manage, version, and deploy changes, ensuring a consistent and reliable environment for your application.
By leveraging the CoinGecko API with Azure Functions, you can create a robust, scalable solution for real-time cryptocurrency price alerts. This ensures timely notifications for users while benefiting from the cost-efficiency and scalability of serverless computing.
If you enjoyed this article, be sure to check out this guide on building a crypto portfolio dashboard in Python!


 Or check it out in the app stores
 Arbitrum
 Avalanche
 Fantom
 Flare
Flare
 Gnosis
 Linea
Linea
 Optimism
 Polygon
 Polygon zkEVM
 Scroll
 Stellar
 Story
Story
 Syscoin
 Telos
Telos
 Xai
Xai


