
Managing cryptocurrency data effectively can be challenging due to its sheer volume and complexity. By combining the extensive CoinGecko API with the flexibility of GraphQL—a query language developed by Facebook to request exactly the data required from a single endpoint—developers can efficiently query and handle crypto data tailored to specific needs.
This guide walks you through setting up GraphQL to query CoinGecko’s API, demonstrating how to streamline data retrieval for better performance and usability.

Prerequisites: GraphQL Tutorial
To follow this guide, you’ll need the following in place:
Familiarity with JavaScript and Node.js
A basic understanding of JavaScript, the primary programming language for this project, is essential. It is used for both client-side and server-side development.
Node.js enables you to run JavaScript on the server and build scalable network applications.
Knowledge of Using Postman
Postman is a popular API development tool that allows you to test and interact with APIs. You should know how to create requests, set headers, and handle responses using Postman. This will help you test your application's endpoints during development.
Basic Understanding of GraphQL (Apollo Server)
With GraphQL, you can ask for only the data you need from an API, making your requests more efficient. Getting the hang of GraphQL will streamline your interaction with APIs. Apollo Server is a community-driven, open-source GraphQL server. Being familiar with the Apollo Server will be beneficial for setting up and managing your GraphQL API endpoints.
Installation of Node.js and npm on Your Device
Ensure you have Node.js installed on your machine, as it's essential for running JavaScript on the server side.
npm is the package manager for Node.js. You'll use npm to manage your project's dependencies and install necessary packages.
Installation of Visual Studio Code (VSCode)
VSCode is a powerful and popular code editor that supports various programming languages and frameworks. It provides features such as syntax highlighting, debugging, and extensions that enhance the development experience. Ensure VSCode is installed on your machine for efficient code editing and project management.
CoinGecko API Demo Key
We'll be leveraging the CoinGecko API to fetch market chart data for cryptocurrencies. The free Demo plan fits our needs perfectly – it allows for 30 calls per minute and up to 10,000 calls per month. Feel free to explore our API documentation or create a Demo account account to give it a try.
With these prerequisites in place, we are ready to start!
Setting Up the Development Environment
As an initial step, we have to set up a simple backend server in Node.js and install all required dependencies.
Create a project folder, open the folder path in the terminal and enter the following command:
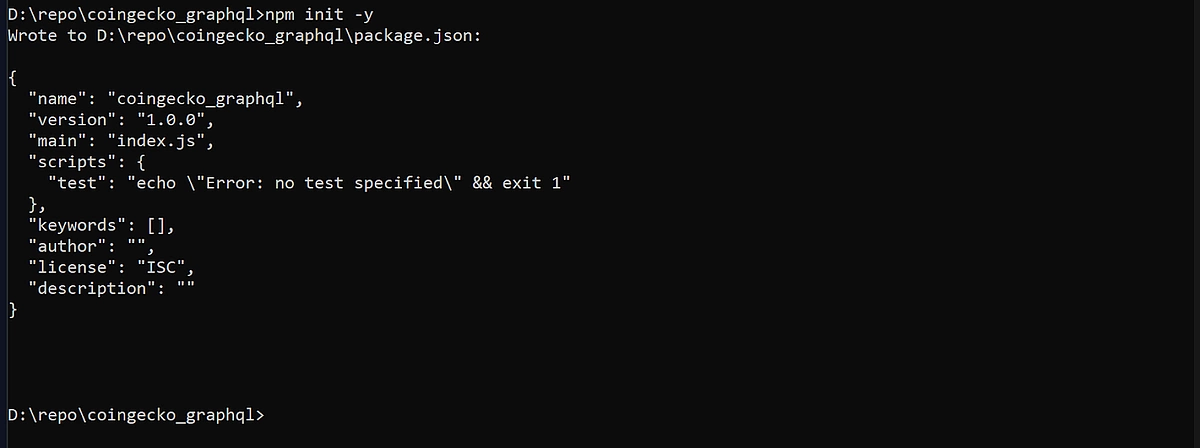
npm init -y
Now a node.js project has been initialised on your selected path.
Step 1. Installing Required Packages
Let’s Install the required dependencies and complete the setup. To get started, we'll need to install the necessary dependencies for our project. Open your terminal and run the following command:
npm install apollo-server axios dotenv nodemon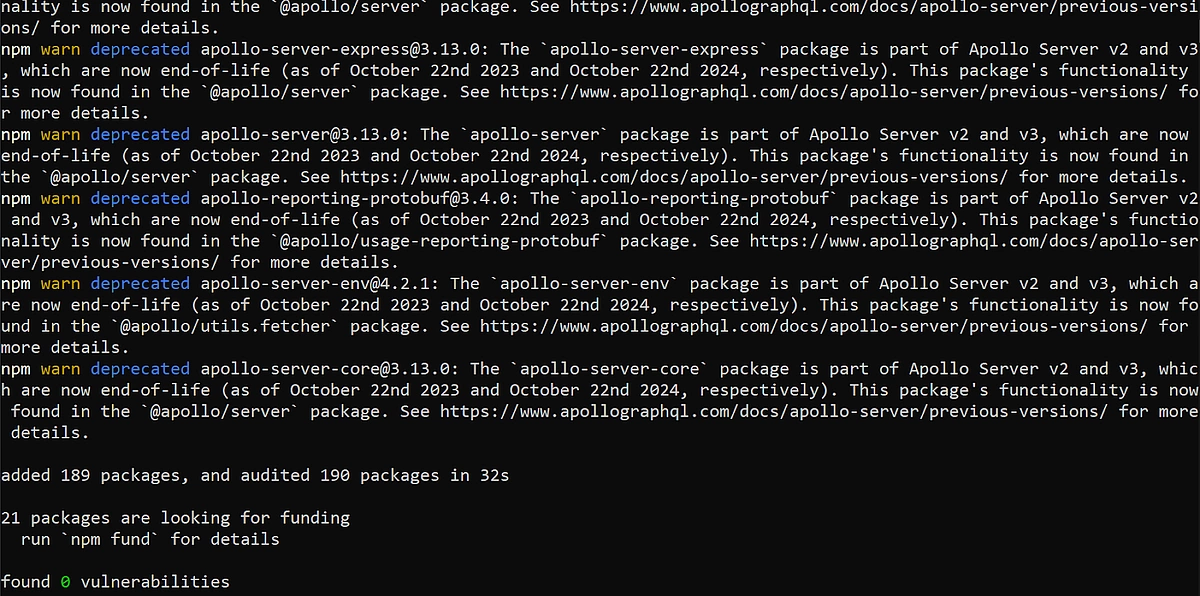
This command will install the following packages:
- apollo-server: This package is used to implement the GraphQL server. It provides a straightforward way to create a GraphQL API by defining the schema and resolvers.
- axios: A promise-based HTTP client for making API requests. We'll use Axios to fetch data from the CoinGecko API.
- dotenv: This package allows us to load environment variables from a .env file into process.env. This is useful for managing configuration settings, such as API keys.
- nodemon: A utility that automatically restarts your Node.js application when file changes are detected. This is helpful during development to save time and improve productivity.
With these dependencies installed, we are now ready to proceed with the setup, begin writing our GraphQL server, and integrate it with the CoinGecko API.
Step 2. Server Setup
With the dependencies installed, open the folder in any code editor you are familiar with. For this guide, we will use VsCode.
Create an environment variable storage file to store your CoinGecko API key. Create a file named .env and store your API key like below:
COINGECKO_API_KEY=your_api_key_here💡Pro-tip: As we don’t want to expose our API key publicly, be sure to create a file called .gitignore and enlist .env into it.
Now, we need to create an entry point file for our node.js server. To keep the guide simple, we will implement the API logic in the same file.
Let’s name it index.js. After creating the file, open the package.json and add the below code to the scripts:
"dev":"nodemon index.jsNow your package.json should look like this:
{

  "name": "coingecko-graphql",

  "version": "1.0.0",

  "main": "index.js",

  "scripts": {

    "test": "echo \"Error: no test specified\" && exit 1",

    "dev": "nodemon index.js"

  },

  "keywords": [],

  "author": "",

  "license": "ISC",

  "description": "",

  "dependencies": {

    "apollo-server": "^3.13.0",

    "axios": "^1.7.7",

    "dotenv": "^16.4.5",

    "graphql": "^16.9.0",

    "nodemon": "^3.1.7"

  }

}
By doing this, we just pointed to the “index.js” file as the server's entry point, which means the script in it will be run on server start.
Step 3. Setting up GraphQL Schema
Think of the schema as your blueprint for the API – it outlines what your API can do, the data it can provide, and the structure of requests and responses. A well-defined schema is crucial because it sets the foundation for how clients will interact with your API and the type of data they can request.
In our schema, we define two primary types of data:
- Coin: This type holds basic market information such as the current price, market capitalization, trading volume, etc. It's useful for fetching real-time data on a specific cryptocurrency.
- HistoricalData: This type contains data over a period, like historical prices, market caps, volumes, and other time-series data. It’s essential for analysing trends and patterns over time.
We also define two queries (or endpoints) within our schema, which clients can use to fetch specific data:
- getCoinData: This query fetches the current data for a specific coin, such as its current price and market capitalization. It’s typically used for getting the latest market information.
- getHistoricalData: This query retrieves historical data for a coin, such as price and market cap over time. It’s useful for analysing the performance of a cryptocurrency over a certain period.
Here’s an example of how the schema looks in code:
schema.js
const { gql } = require('apollo-server');

// Define GraphQL schema

const typeDefs = gql`

  type Coin {

    id: String

    symbol: String

    name: String

    current_price: Float

    market_cap: Float

  }

  type HistoricalData {

    prices: [[Float]]

    market_caps: [[Float]]

  }

  type Query {

    getCoinData(id: String!): Coin

    getHistoricalData(id: String!, days: Int!): HistoricalData

  }

`;

module.exports = typeDefs;
Breakdown of the Schema
-
Types: We define Coin and HistoricalData as types. Each type includes specific fields that describe the data:
- Coin includes id, name, symbol, marketCap, currentPrice, and volume.
- HistoricalData includes date, price, marketCap, and volume.
-
Queries: We define two queries:
- getCoinData(id: ID!): This query takes a coin id as an argument and returns data of type Coin.
- getHistoricalData(id: ID!, days: Int!): This query takes a coin id and the number of days as arguments, returning a list of HistoricalData.
Step 4. Writing the Resolvers
Now that we’ve defined what our API can do with the schema, it’s time to implement the logic for fetching the data using CoinGecko API. This is where resolvers come in. Resolvers are like the chefs in a kitchen—you tell them what you want, and they go fetch it, serving up the data just as you requested.
Here's a breakdown of what each resolver will do:
- getCoinData: Fetches the latest data for a specific coin from CoinGecko.
- getHistoricalData: Retrieves historical prices and market caps for a coin over a specified number of days.
Defining Resolvers
Let's write the resolvers to handle these queries. Create a file named resolvers.js and add the following code:
const axios = require('axios');

require('dotenv').config();


const COINGECKO_API_BASE_URL = 'https://api.coingecko.com/api/v3';

const API_KEY = process.env.COINGECKO_API_KEY;


const resolvers = {

  Query: {

    // Fetch current market data for a specific coin

    async getCoinData(_, { id }) {

      try {

        const response = await axios.get(`${COINGECKO_API_BASE_URL}/coins/markets`, {

          params: { vs_currency: 'usd', ids: id },

          headers: { 'x-api-key': API_KEY },

        });

        return response.data[0]; // Return the first result

      } catch (error) {

        console.error('Error fetching coin data:', error.message);

        throw new Error('Could not fetch coin data');

      }

    },

    // Fetch historical data for a specific coin

    async getHistoricalData(_, { id, days }) {

      try {

        const response = await axios.get(`${COINGECKO_API_BASE_URL}/coins/${id}/market_chart`, {

          params: { vs_currency: 'usd', days },

          headers: { 'x-api-key': API_KEY },

        });

        return response.data;

      } catch (error) {

        console.error('Error fetching historical data:', error.message);

        throw new Error('Could not fetch historical data');

      }

    },

  },

};


module.exports = resolvers;
Breakdown of the Resolvers
The getCoinData resolver takes an id as an argument, representing the unique identifier of the cryptocurrency. It makes a GET request to the CoinGecko API endpoint for market data, specifically targeting the currency in USD and filtering by the provided id. The API key is included in the headers for authentication, and the response data is returned as the first result in the array.
The getHistoricalData resolver takes two arguments: id (the unique identifier of the cryptocurrency) and days (the number of days of historical data to fetch). It makes a GET request to the CoinGecko API endpoint for market chart data, specifying the currency in USD and the number of days. The API key is included in the headers for authentication, and the response data is processed to format the dates and extract prices, then returned as an array of objects.
Step 5. Creating GraphQL API
Connecting Schema and Resolvers to Apollo Server
Now that we have our schema and resolvers defined, the next step is to connect them and set up the Apollo Server. The index.js file will serve as the entry point for our server, where we initialize and configure the Apollo Server to combine the schema and resolvers into a working GraphQL API.
Apollo Server acts as the core of our GraphQL setup. It brings together the schema (which defines the structure of our API) and the resolvers (which provide the logic for fetching data). By doing so, it allows us to create a fully functional GraphQL API that clients can query for data.
Setting Up the Apollo Server
Create an index.js file and add the following code to set up the Apollo Server:const { ApolloServer } = require('apollo-server');
const typeDefs = require('./schema'); // Import the schema
const resolvers = require('./resolvers'); // Import the resolvers
// Create the Apollo Server
const server = new ApolloServer({
typeDefs,
resolvers,
});
// Start the server
server.listen().then(({ url }) => {
console.log(`Server ready at ${url}`);
});By connecting the schema and resolvers to the Apollo Server, we establish a fully functional GraphQL API. This setup allows clients to send queries to the server, which will then use the resolvers to fetch the required data and return it in the format defined by the schema.
With the server up and running, you can now test your GraphQL API by sending queries to the specified URL. You can use tools like Postman or GraphQL Playground to interact with your API and validate its functionality.
Step 6. Testing GraphQL API using Postman
Before we start testing our GraphQL API, we need to ensure our server is running and ready to accept API requests. To do this, open your terminal and run the following command:
npm run dev
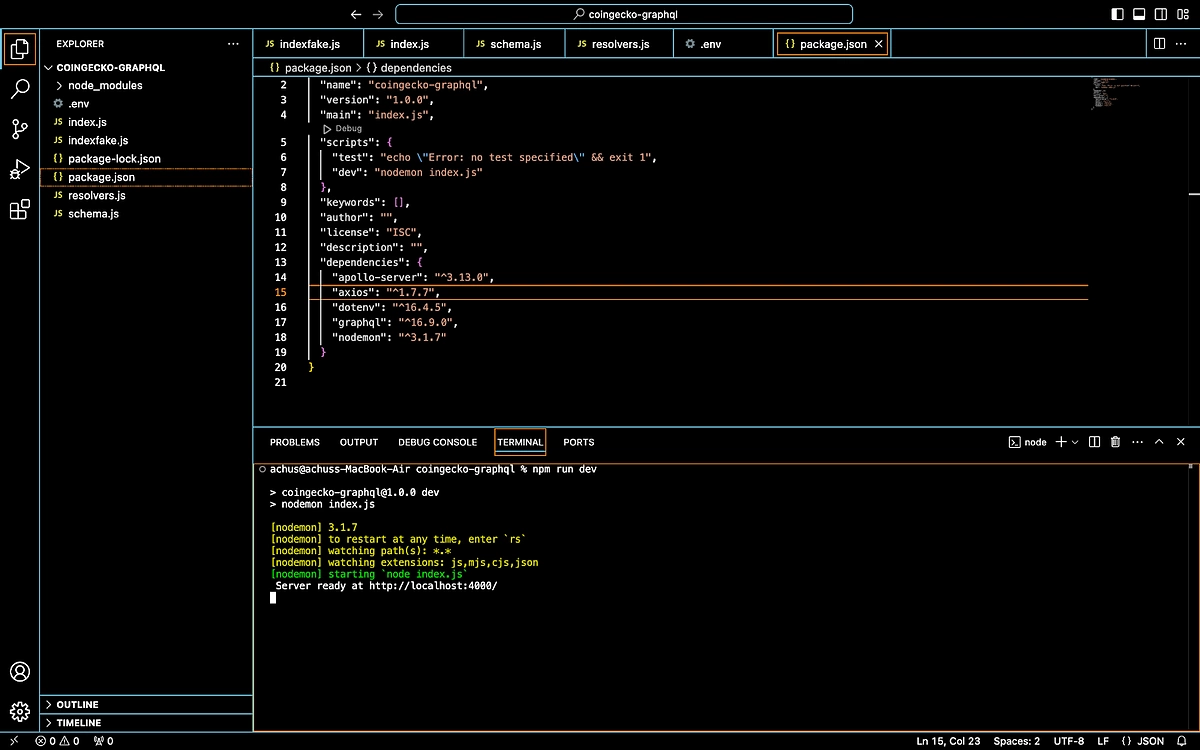
If everything is set up correctly, your server should be running and ready to accept requests.
Testing the API with Postman
While you can use GraphQL Playground or any other GraphQL client, we'll demonstrate how to test our APIs using Postman.
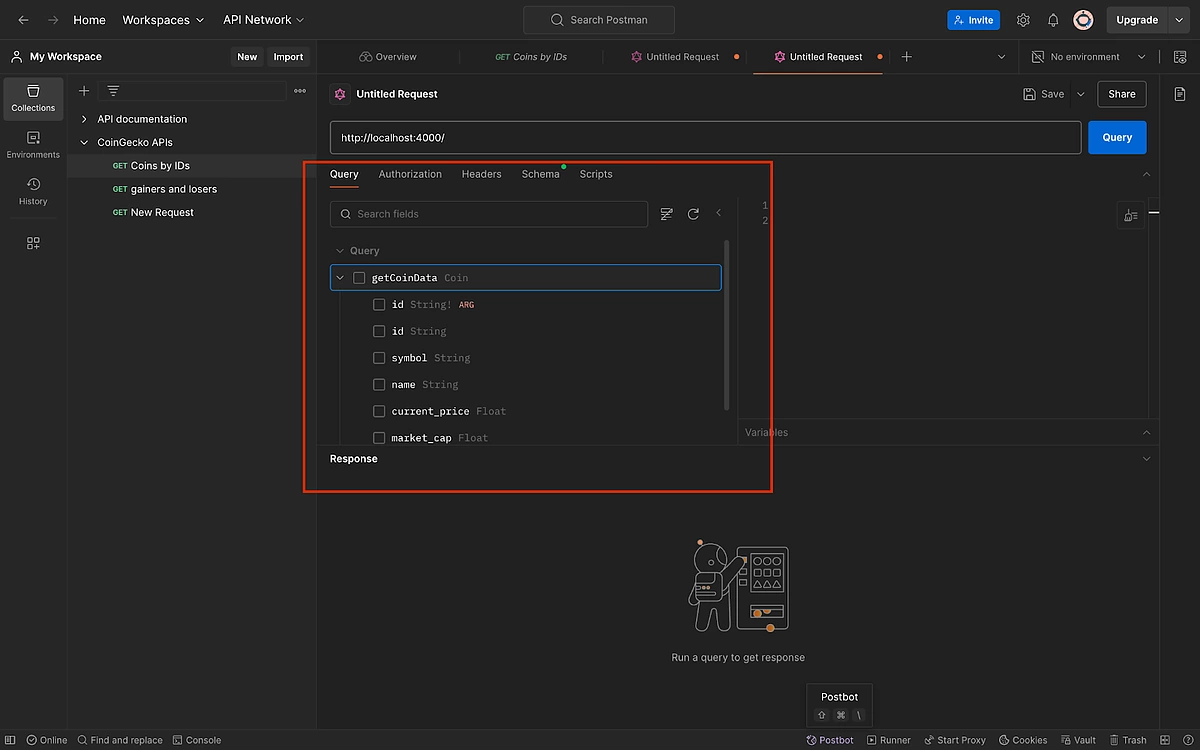
Launch Postman and click on "New" to create a new GraphQL request. In the popup window, select "GraphQL"
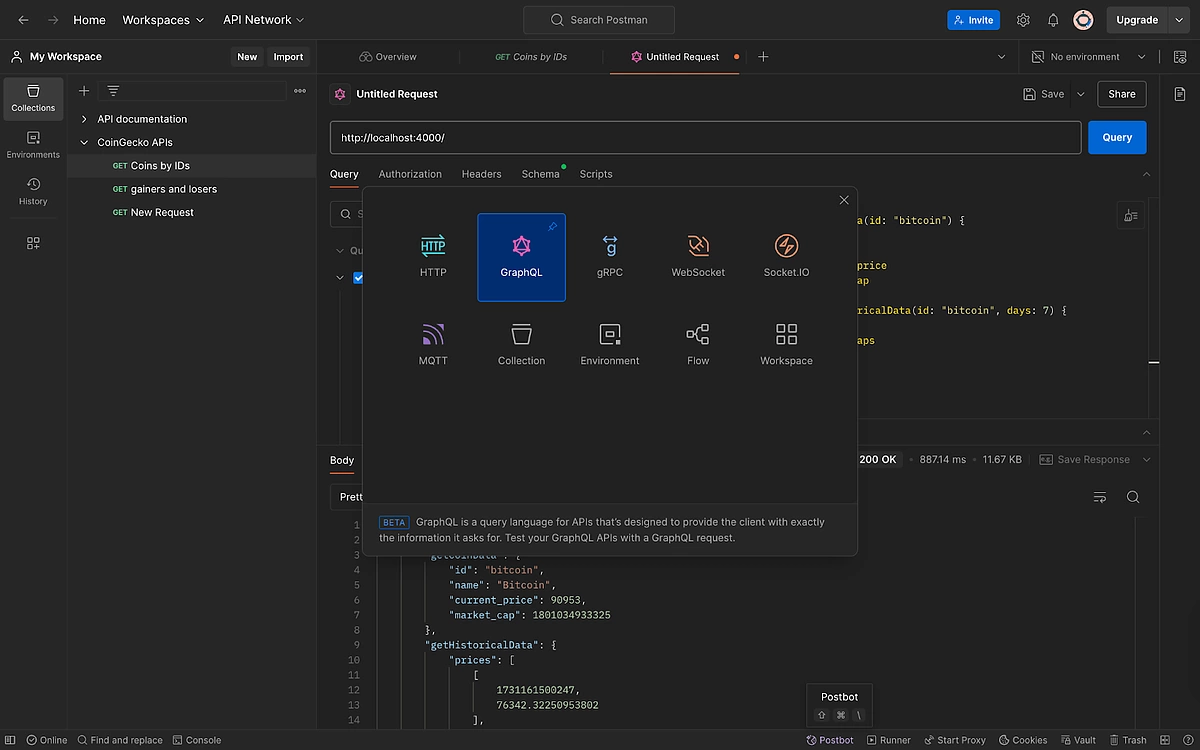
Enter your Node.js server URL. By default, it should be http://localhost:4000/.
Configure the Request
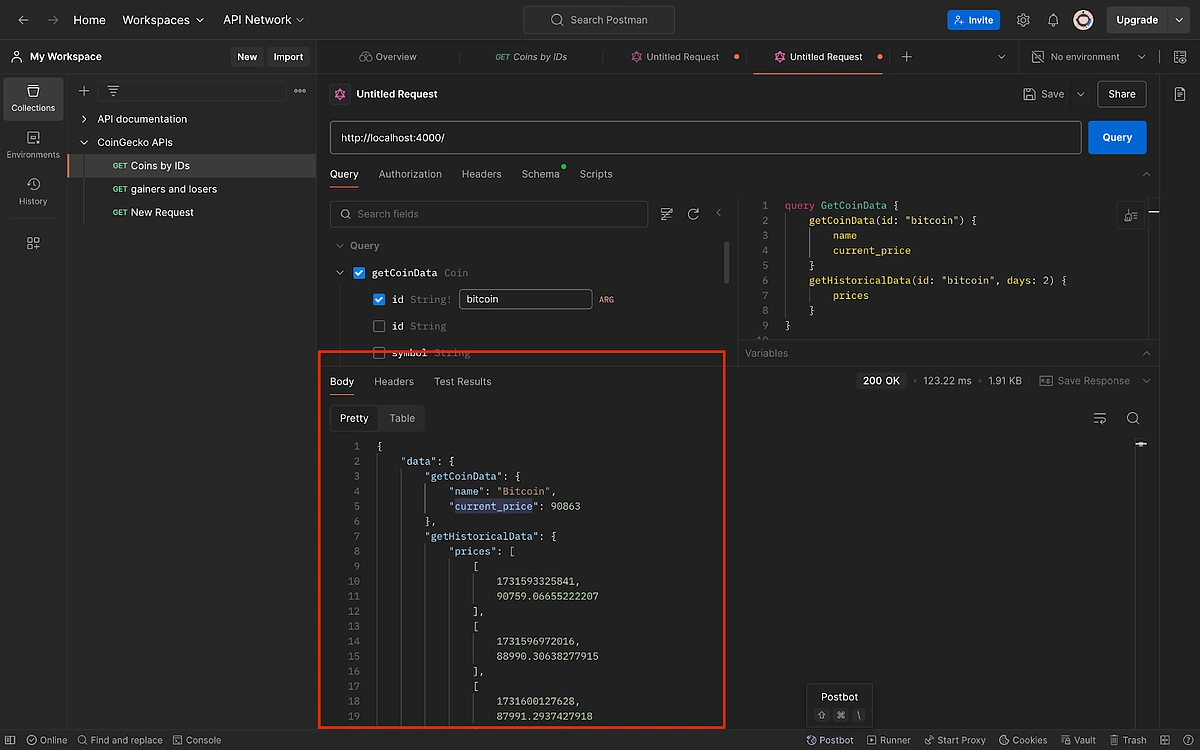
Once you enter the URL, you will see available fields listed with checkboxes. Check the boxes for the needed fields, and then click on "Query" to make the API call.
Sending the Request
Postman will execute the query and return the data for the selected fields.
The Advantages of Using GraphQL
Using GraphQL offers significant advantages, especially when dealing with complex and comprehensive data sources like CoinGecko. Here are some key benefits:
Efficient Data Fetching: With GraphQL, you can request exactly the data you need, no more and no less. This means you can avoid over-fetching or under-fetching data, which is common with REST APIs. By requesting only the necessary fields, you reduce the payload size and improve performance.
Single Endpoint: Unlike REST APIs, where you might need multiple endpoints to fetch different types of data, GraphQL allows you to access all the required data through a single endpoint. This simplifies the client-server communication and reduces the complexity of managing multiple endpoints.
Flexible and Powerful Queries: GraphQL enables you to construct flexible and powerful queries. You can easily query nested data structures, filter results, and perform complex operations within a single request. This flexibility makes it easier to handle complex data relationships.
Mutability and Flexibility: GraphQL supports not only queries for fetching data but also mutations for creating, updating, and deleting data. This provides a comprehensive solution for interacting with APIs, allowing developers to perform various data operations easily. This mutability makes it highly flexible and adaptable to different data management needs.
Conclusion
By querying only the essential fields, you can make API calls faster by reducing payload and response data size. This improves performance and simplifies data transformation, as you only request the exact data you need from CoinGecko. This approach minimizes the amount of unnecessary data transferred over the network, leading to quicker response times and a more efficient API call process. By focusing on the essential fields, you also ensure that your application handles only relevant data, which can significantly reduce the processing load on both the client and server sides.
Enjoyed this article? Take things up a notch with our Python guide on how to build your own crypto portfolio dashboard.


 Or check it out in the app stores

