
What Is MetaMask?
MetaMask is a self-custodial software (hot) wallet that supports Ethereum and EVM-compatible networks, and also includes swapping and bridging features. It is available as a mobile app and a browser extension.
Key Takeaways
-
MetaMask is an EVM wallet for storing your ETH and other ERC standard tokens.
-
As MetaMask is a self-custodial wallet, users are responsible for the management of their assets on the platform.
-
This guide serves as a basic introduction to MetaMask and how new users can set up their first MetaMask wallet.
This article was updated in August 2024 by Joel Agbo.
If you’ve ever looked into buying or trading Ethereum and other ERC-20 tokens before, then you’ve probably heard the word MetaMask mentioned. If you already know what MetaMask is and how to use it, then feel free to skip this article. But for those of you who have been wondering just what MetaMask is, then this guide was made for you.
An Introduction to MetaMask
MetaMask is a self-custodial crypto wallet for managing assets on Ethereum and other EVM (Ethereum Virtual Machine)-compatible networks, available as a mobile app and a browser extension. MetaMask was launched by Consensys in 2016 as an Ethereum wallet and has since expanded to support all EVM networks. At time of writing, MetaMask is used by over 10 million cryptocurrency investors to manage their assets.
However, as MetaMask is an EVM wallet, you will only be able to store ETH and ERC standard tokens on it. MetaMask is a ‘hot wallet’ – a cryptocurrency wallet that is always connected to the internet – enabling quick access to digital assets and decentralized applications (dApps). A dApp is called as such because its backend code runs on a decentralized network i.e. Ethereum, unlike a regular app where the backend code is on centralized servers.
Another key feature of MetaMask is its ability to interact with EVM networks. This means that MetaMask allows users to use their MetaMask wallets to access all the dApps hosted on different EVM networks. Some examples of popular dApps include decentralized exchanges like Uniswap, liquid staking projects like Lido, and games like Axie Infinity. Without the use of a wallet like MetaMask, your browser would not be able to access the Ethereum blockchain unless you were running a full Ethereum node. MetaMask does this by injecting a javascript library known as web3.js (written by the core Ethereum team) into your browser’s page.
Recently, MetaMask has also released Snaps, allowing users to connect to non-EVM networks like Solana with their MetaMask wallets, along with offering additional utilities like transaction previews. MetaMask Snaps are Javascript applications that utilize MetaMask wallet’s facilities to operate.
MetaMask is also open source, and if you’re interested you can view their code on GitHub here.
Installing and Setting Up MetaMask
MetaMask is available as a browser extension and as a mobile application. In this guide, we’ll be installing MetaMask as a browser extension on Chrome, and the installation steps are similar on mobile.
Installing MetaMask on Your Device
First, visit the MetaMask website to download the application for your device or browser extension for your web browser.
MetaMask extension works on Chrome, Microsoft Edge, Brave, Opera, and Firefox browsers. The native mobile application is available for Android and iOS devices and can be downloaded from their respective application stores.
Install the application and proceed to set up your account.
Creating a New Wallet
-
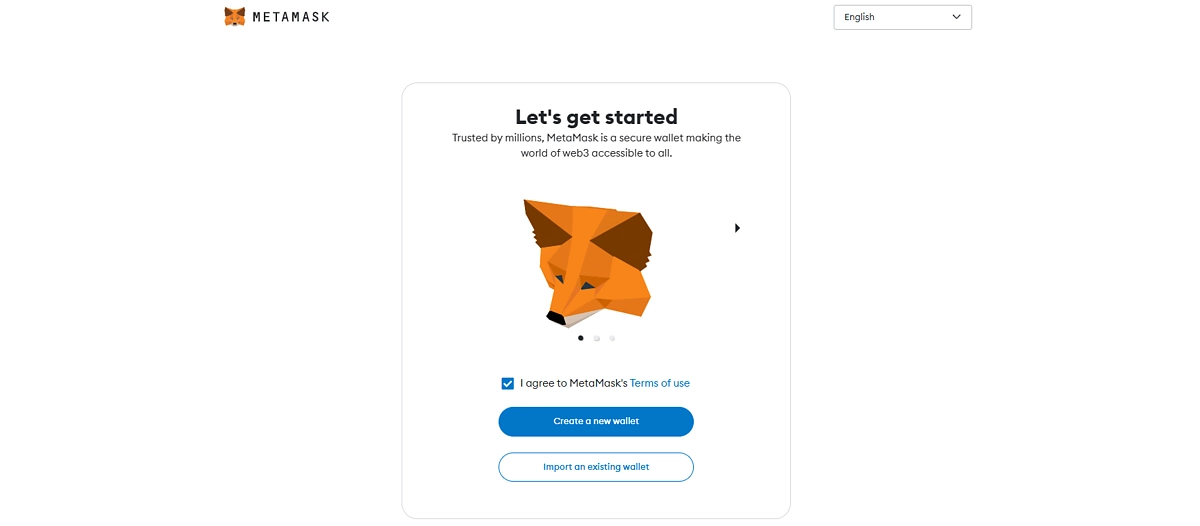
For new users, you can create a new wallet by clicking Create a wallet.
-
Read and agree to MetaMask’s terms and proceed to create your wallet.

-
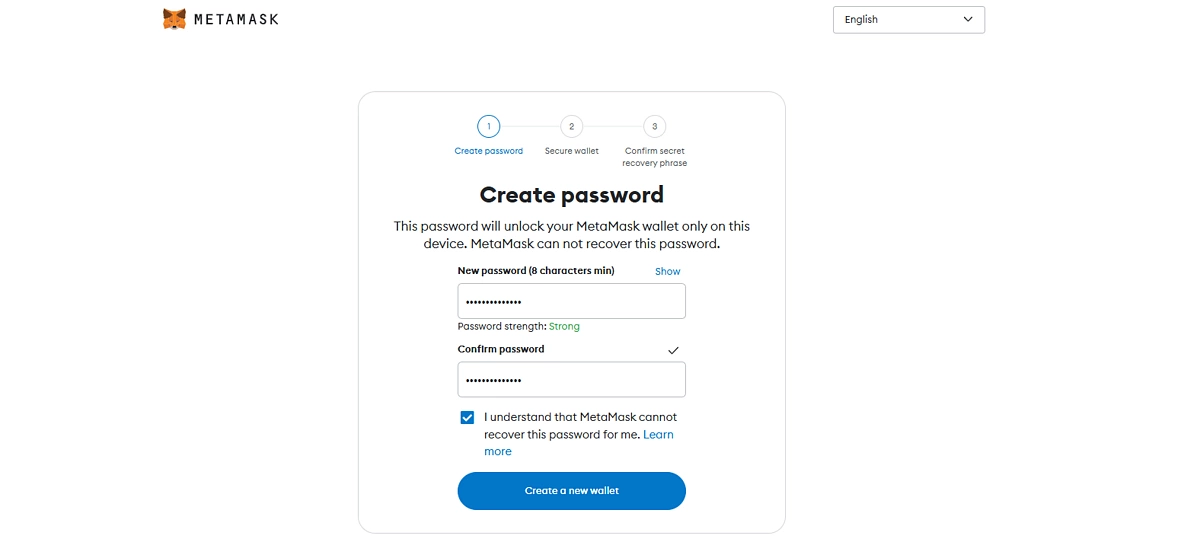
Set up your password and click Create a New Wallet to continue.
-
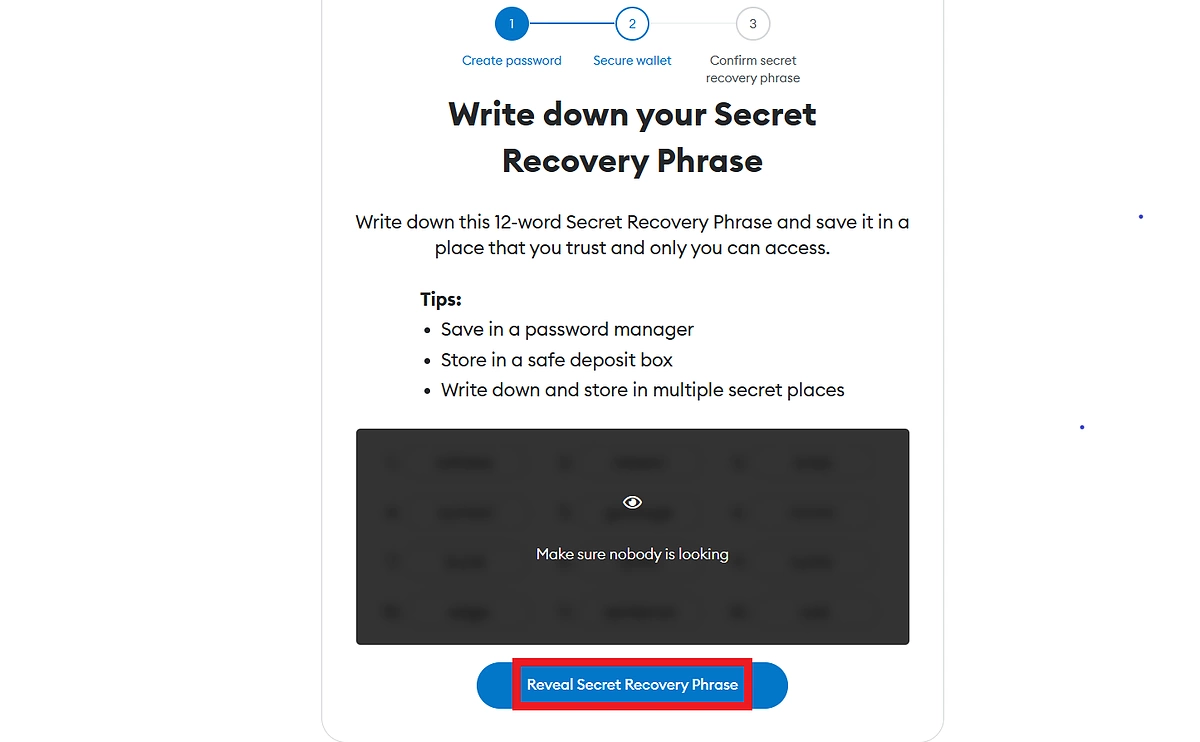
Read the following security information carefully and proceed to copy your wallet’s security phrase. Ideally, this secret recovery phrase should be stored offline in a safe place and on crypto steel.
-
On the next page, confirm your secret recovery phrase to complete the setup process.
Your wallet is now ready for use.
Importing an Existing Wallet
If you already have an existing wallet that you would like to import to MetaMask, you can import it by entering your wallet’s private key or secret recovery phrase.
Importing an existing wallet using the secret recovery phrase
To import your old wallet using your seed phrase when setting up your wallet for the first time:
-
Open your MetaMask wallet, and select Import an existing wallet.
-
Proceed to enter your recovery phrase in the form that pops up.
-
Set up your wallet password and complete the process by clicking Import.
Importing an existing wallet using a private key
You can also import an existing wallet using its private key:
-
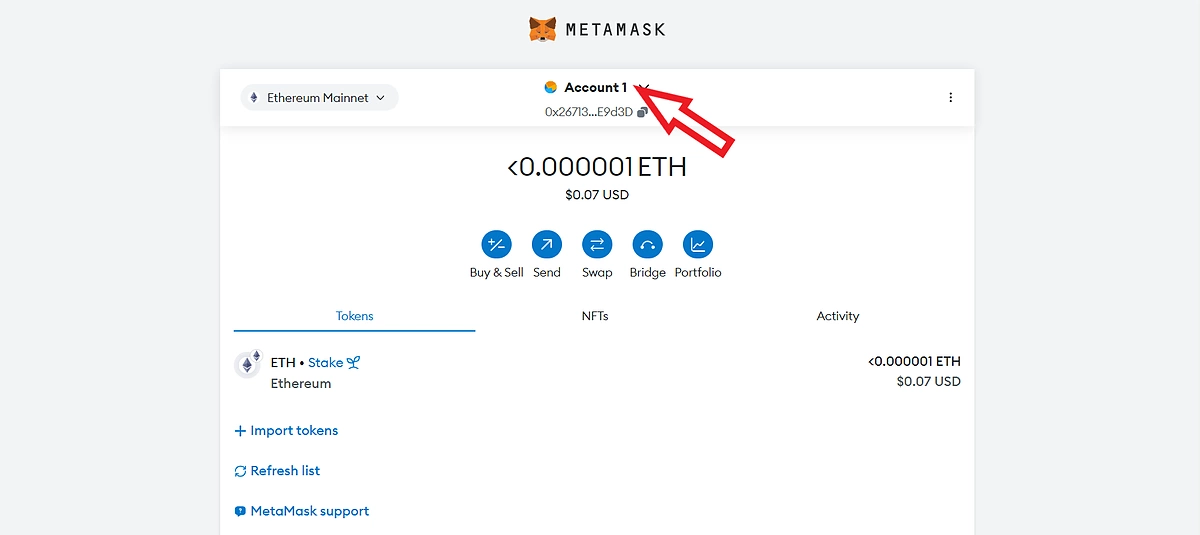
Open your wallet.
-
Click on the account dropdown in the top of your screen.
-
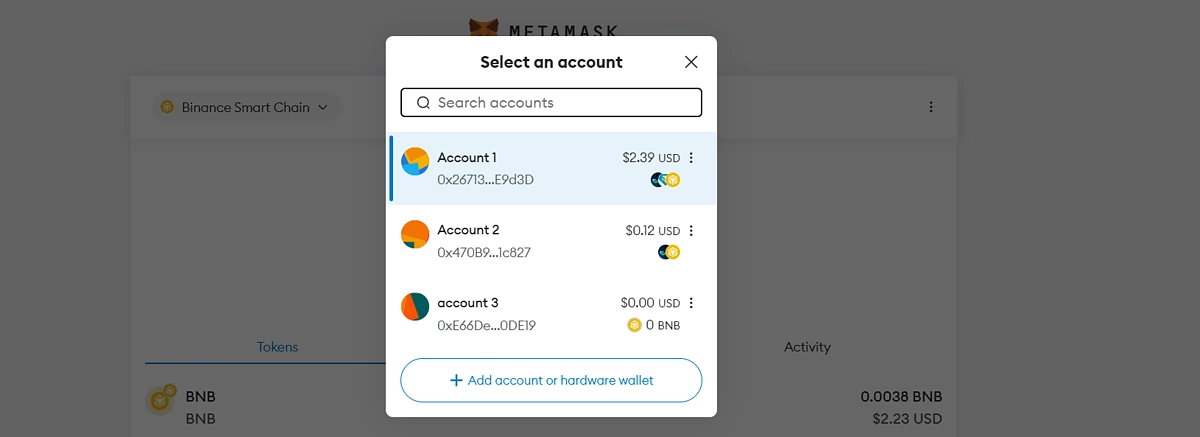
Click Add Account or Hardware Wallet.
-
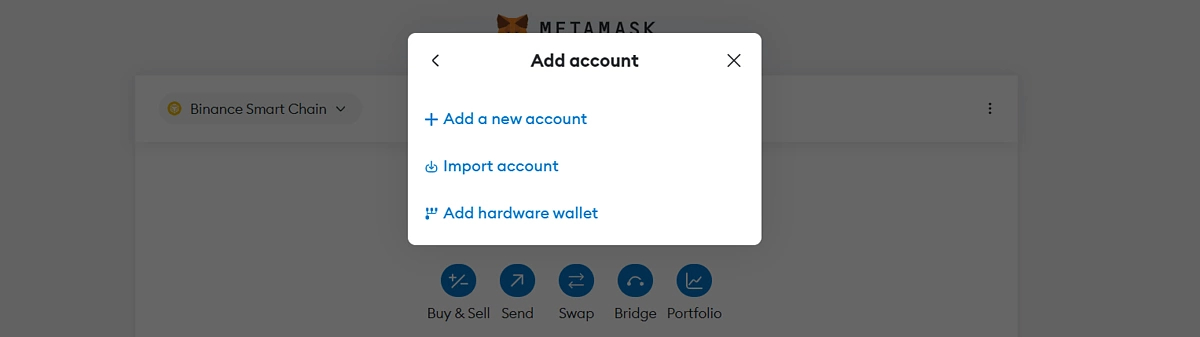
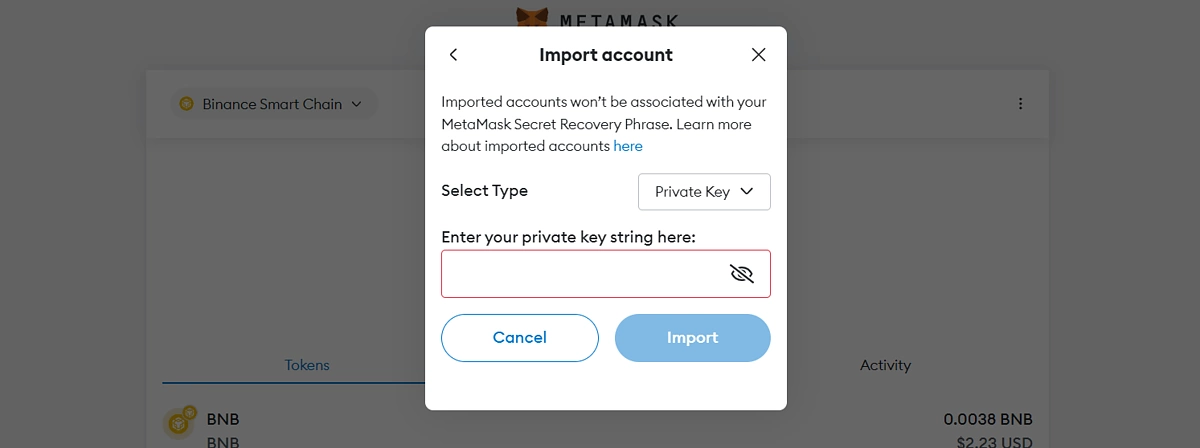
Select Import account.
-
Enter your private key in the form and click Import to complete.
Your existing wallet will now be added to your existing MetaMask account.
How to Add a New Network to Your MetaMask Wallet
MetaMask supports all EVM networks. You can add new and existing networks to your wallet by following the following steps.
-
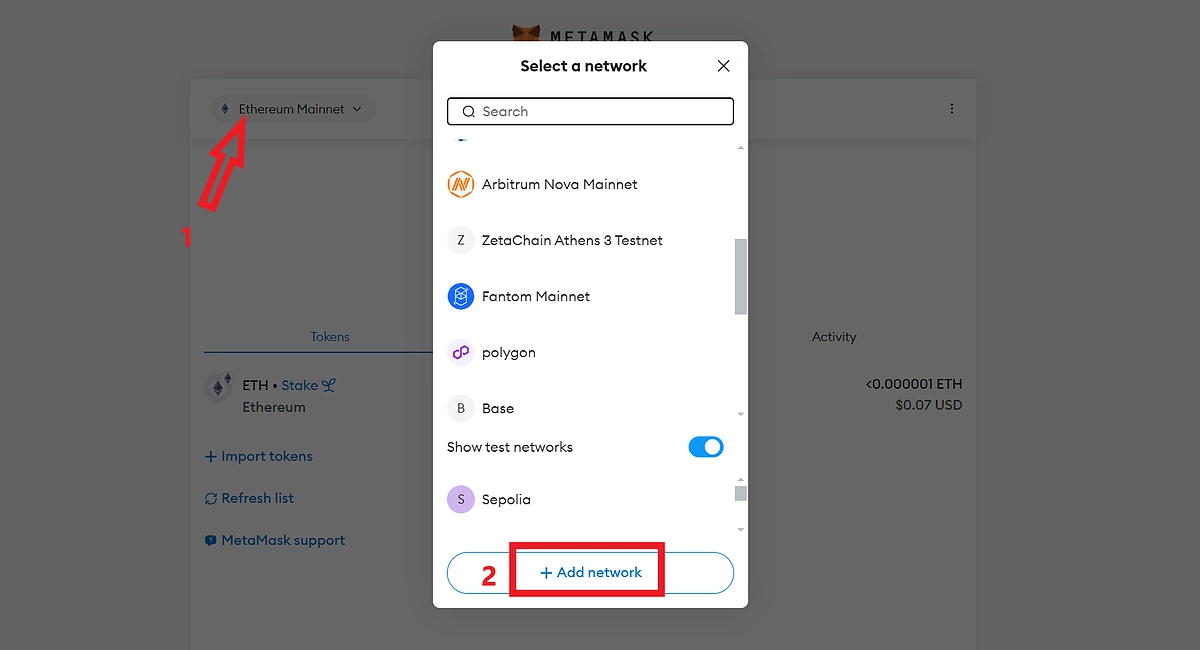
Click on the network dropdown at the top left corner of your wallet homepage.
-
Click Add Network.
-
You can search the network from pre-installed networks by entering the network’s name in the search box.
-
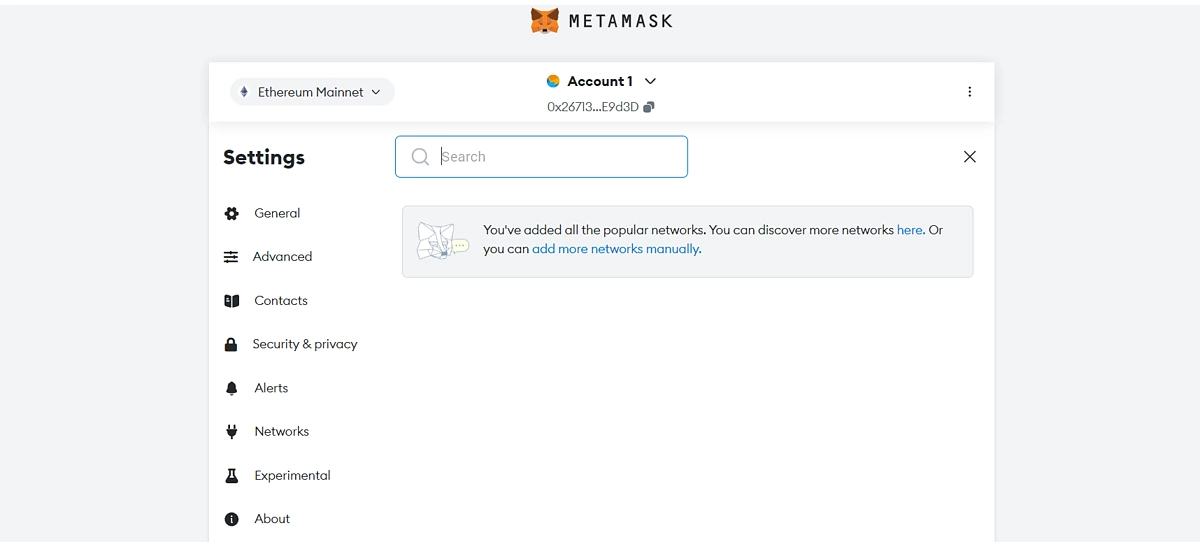
Alternatively, click Add More Networks Manually to add using the network’s details.
-
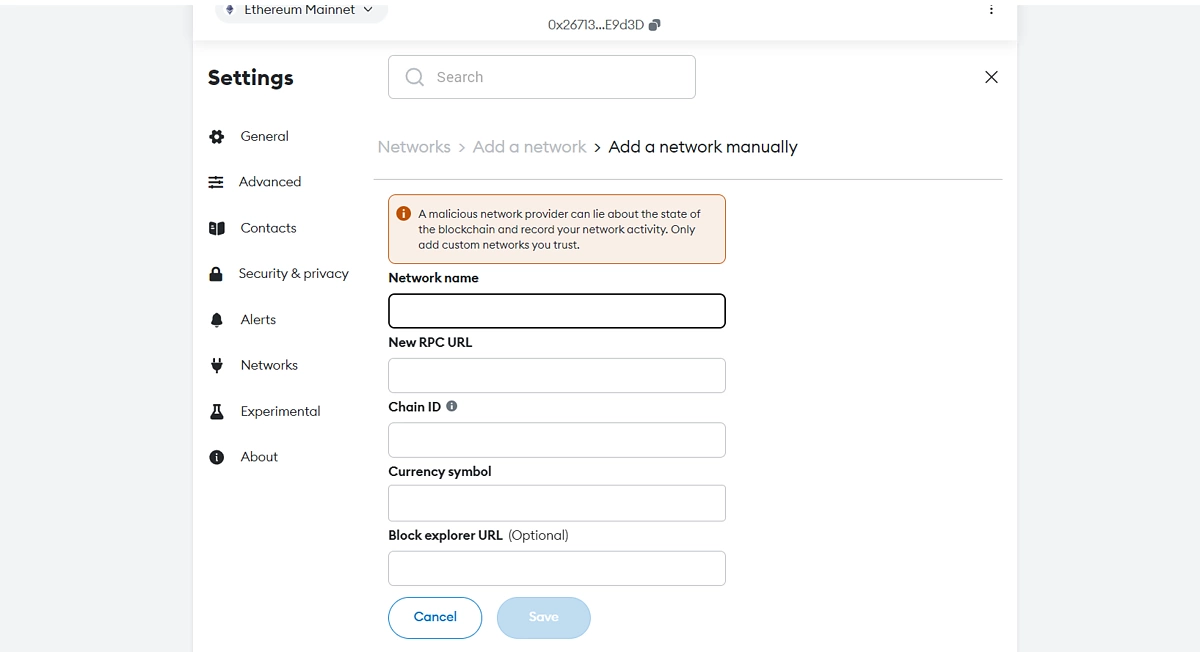
Enter the network’s details in the provided boxes and click on Save to complete.
You can find the network’s details from sources like CoinGecko, the relevant network’s documentation, the chain’s explorer, or Chainlist.
Once you’ve successfully added the new network, you can now switch to the network by clicking on the network dropdown at the top left corner and selecting it from the list.
Networks vs. Test Networks: What’s the Difference?
MetaMask supports a range of networks, from Ethereum to Layer 2s like Arbitrum and Optimism, along with other EVM-compatible networks like BNB Chain and Avalanche. MetaMask also supports Ethereum test networks like Sepolia and Holesky, which act as sandbox test environments for Ethereum users and developers.
Due to the immutable nature of the blockchain, errors and exploits in smart contracts can lead to significant losses, hence the importance of test networks. Test networks offer developers a testing ground for up and coming applications, where they can incentivize users to stress test the application before their official launch.
While test networks mirror the main network, the major difference is that tokens on the test network do not have any monetary value. Tokens on testnets are only intended for testing purposes, and are not meant to be tradable nor hold monetary value.
Sending and Receiving Tokens With MetaMask
To manage a token on your MetaMask wallet, you will need to first import the token.
How to Import a Token to MetaMask
You can add a token to MetaMask using the token’s smart contract address, which can be obtained from the network explorer or from the asset’s page on CoinGecko.
To obtain the smart contract address:
-
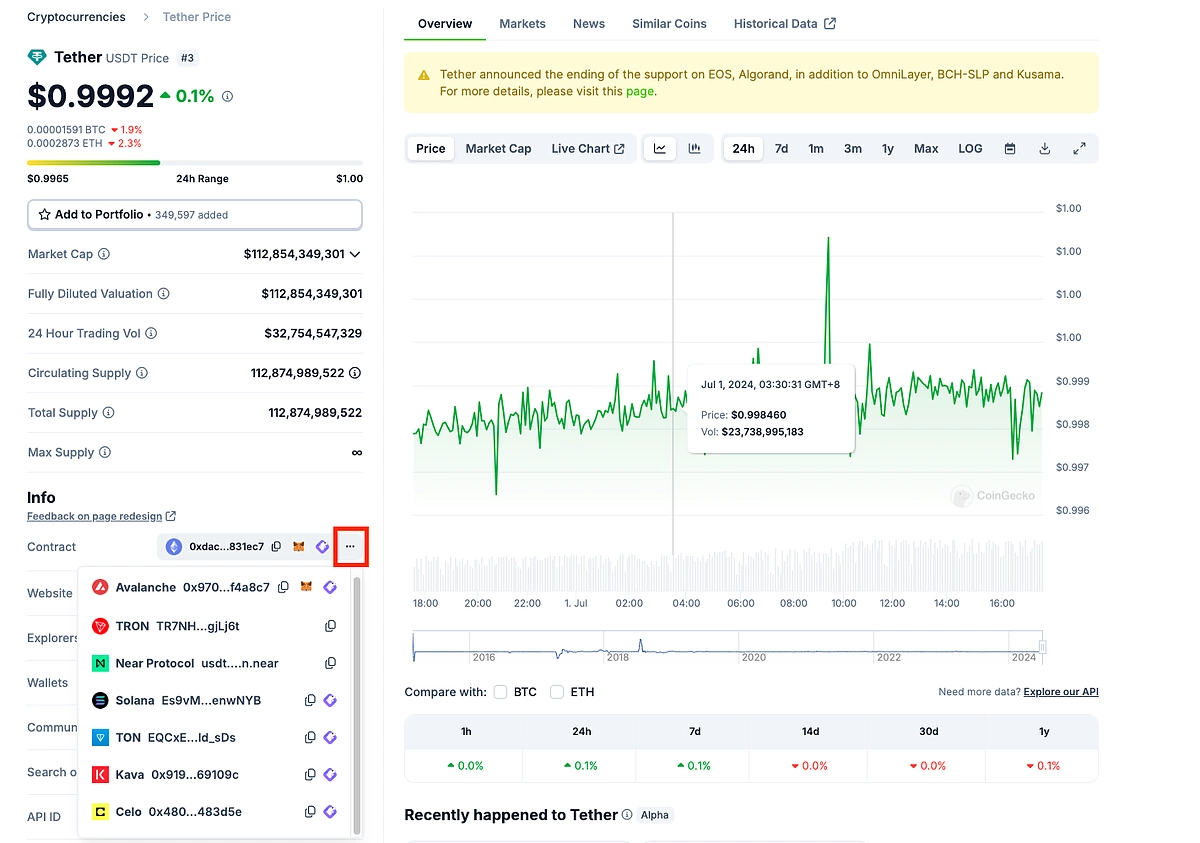
Visit the tokens’ page on CoinGecko.
-
Search the asset using the search bar on the platform.
-
Copy the smart contract address from the asset’s page by clicking on the copy icon.
For multi-chain assets, check to ensure you are adding the right address for the correct chain. You can find the full list of chains by clicking on the ellipsis (...) on the Contract Address field on CoinGecko.
-
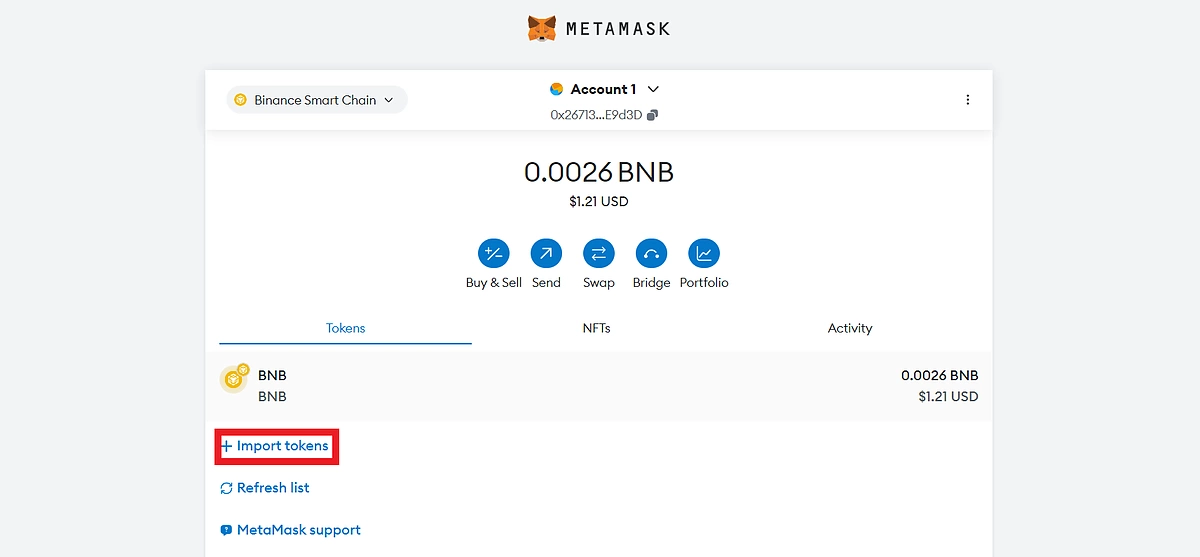
On your MetaMask wallet homepage, click Import tokens.
-
You can search for the token in the autodetection section, or navigate to the Custom token tab to add using the smart contract address.
-
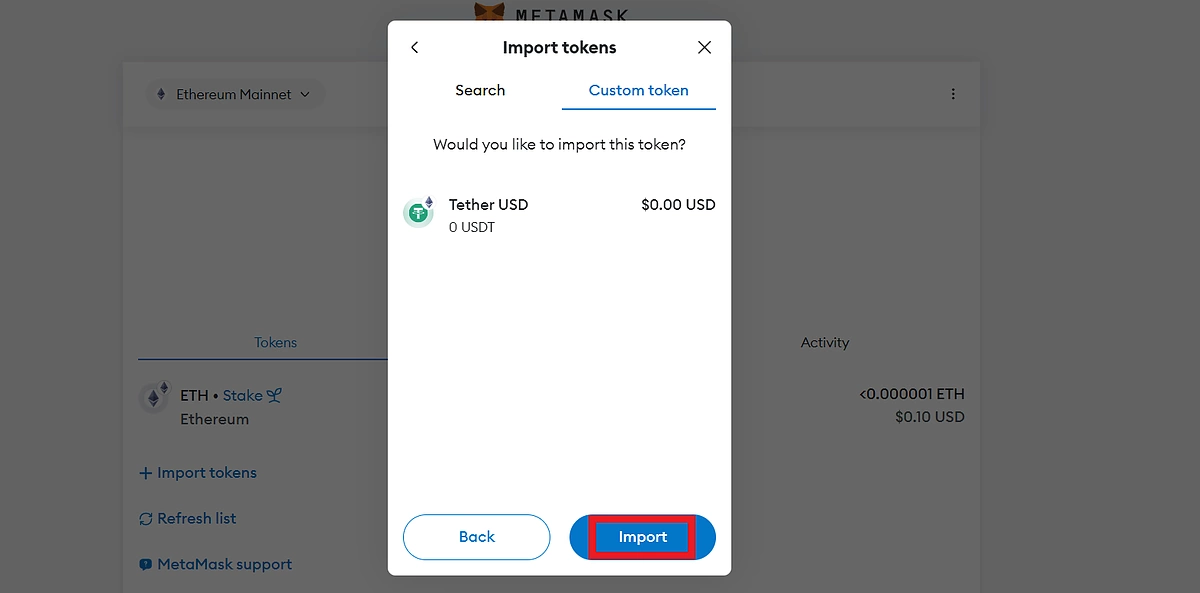
In the Custom Token tab, enter the smart contract address in the designated box. The auto-complete feature will enter the other details automatically.
Also ensure that the wallet network corresponds to the chain for which the copied smart contract.
-
Click Next to continue.

-
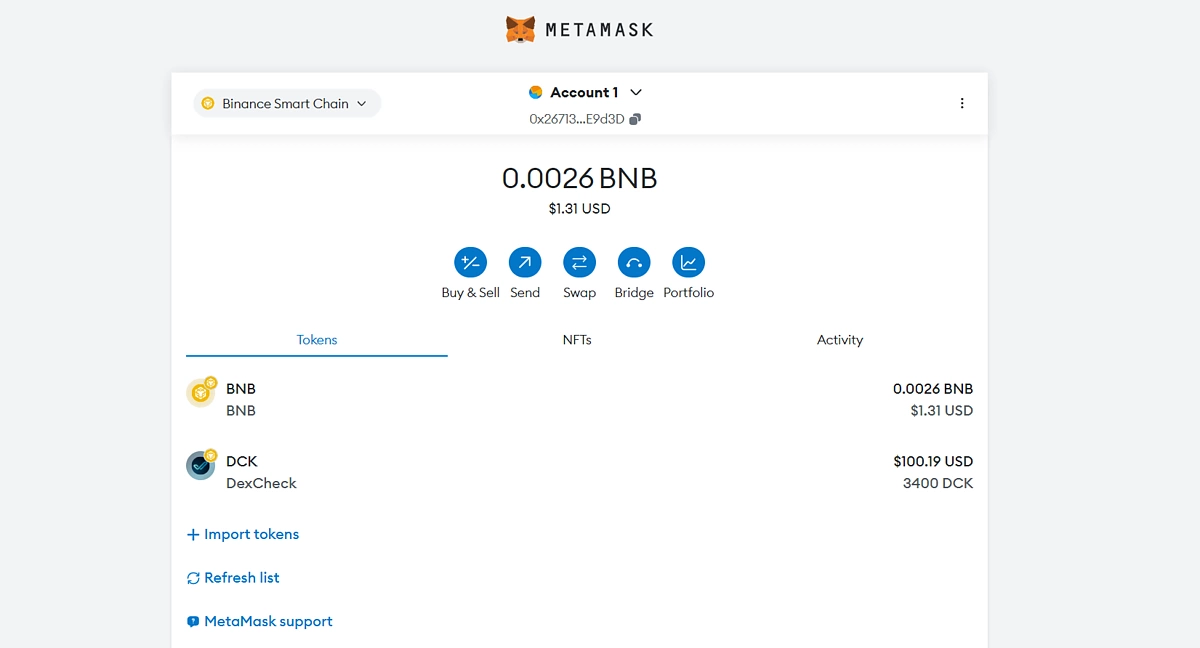
Click Import to complete.
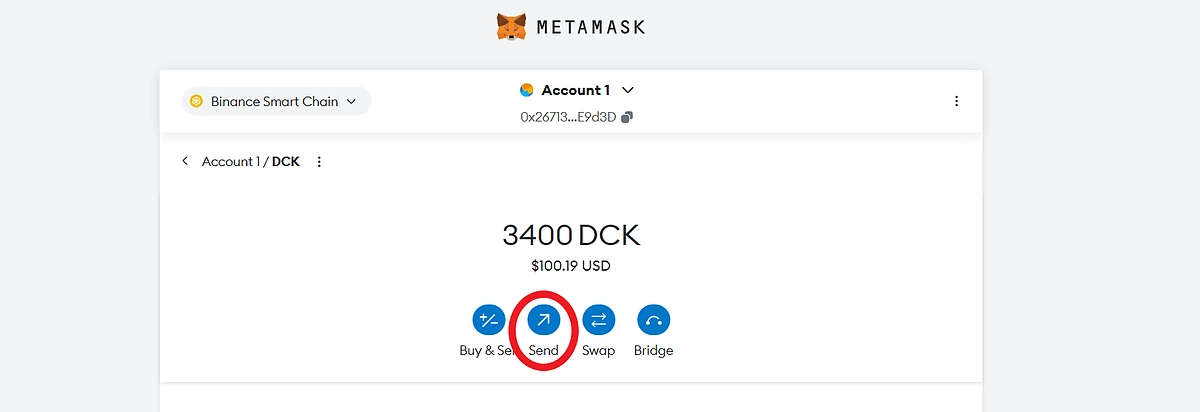
How to Send Tokens With MetaMask
To send a token:
-
Click on the token from your asset list.
-
From the token’s page, click Send.
-
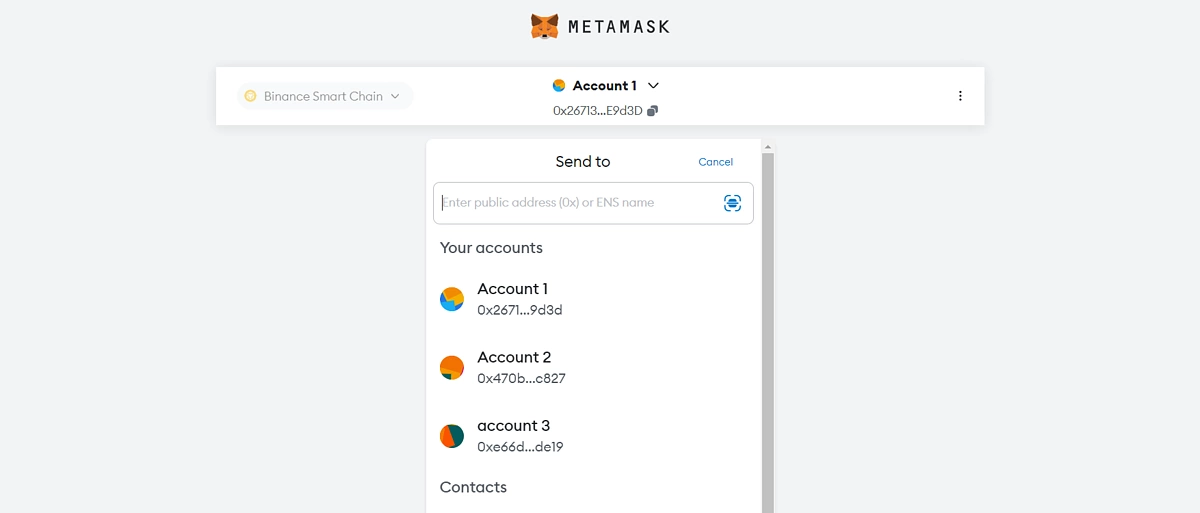
Enter the wallet address of the recipient to proceed.
-
Enter the amount you wish to send and click Next to continue.

-
Click Confirm to complete.

The token will arrive in the recipient's wallet once the transaction is confirmed on the network.
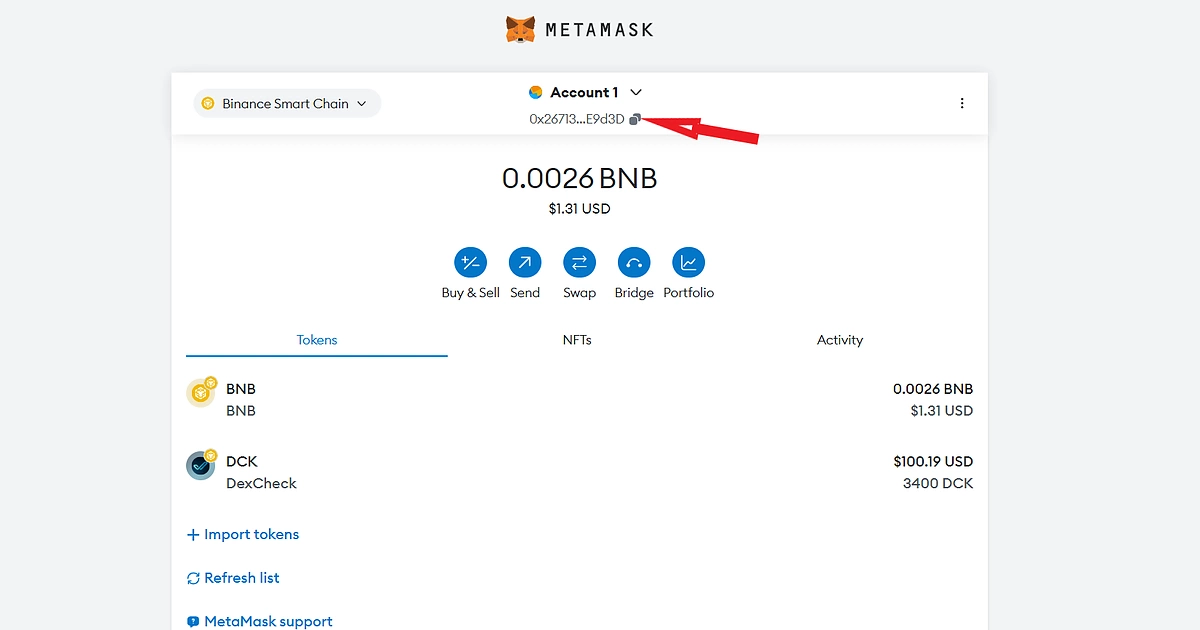
How to Receive Tokens on MetaMask
To receive any asset on your MetaMask wallet, you just need your wallet address.
You can copy your wallet address from your MetaMask by clicking on the copy icon in the area indicated above.
When sending cryptocurrency from a different wallet or platform, you just have to paste your wallet address in the designated recipient address field.
Always check that the address is correct before sending cryptocurrencies, as the self-custodial nature of MetaMask means that any transfers to the wrong address are irreversible.
Learn about what happens if you send crypto the wrong address.
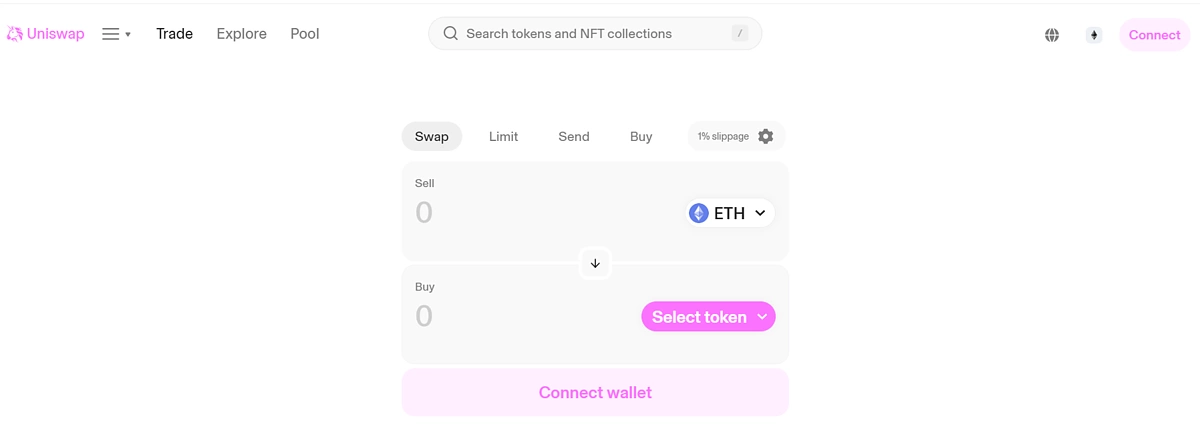
Interacting With dApps Using MetaMask
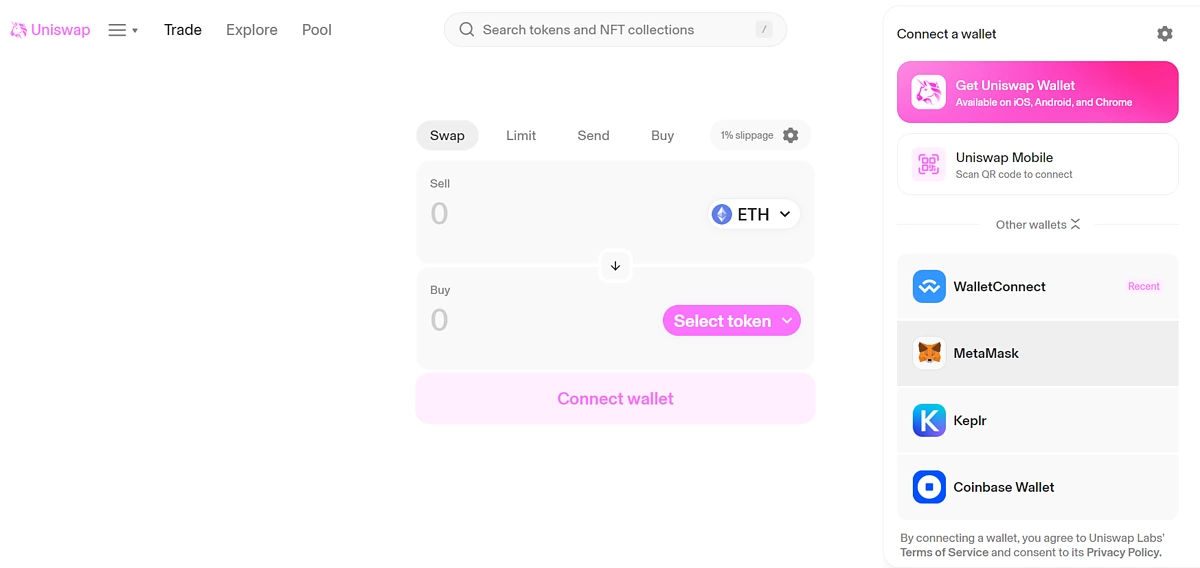
You can connect to decentralized applications on EVM networks using your MetaMask wallet. To demonstrate this, we will connect to Uniswap, a multichain decentralized exchange.
To connect to the dApp:
-
Visit the project’s platform from your browser (with MetaMask installed).
If you are using MetaMask on mobile, use the MetaMask browser within the app.
-
From the platform, click Connect / Connect Wallet.
-
Select MetaMask as your wallet to connect to the dApp.
-
A connection request prompt will be sent to your wallet; approve the request to connect to the platform.

With this, you are now connected to the platform, and approval requests for every transaction will be sent to your wallet.
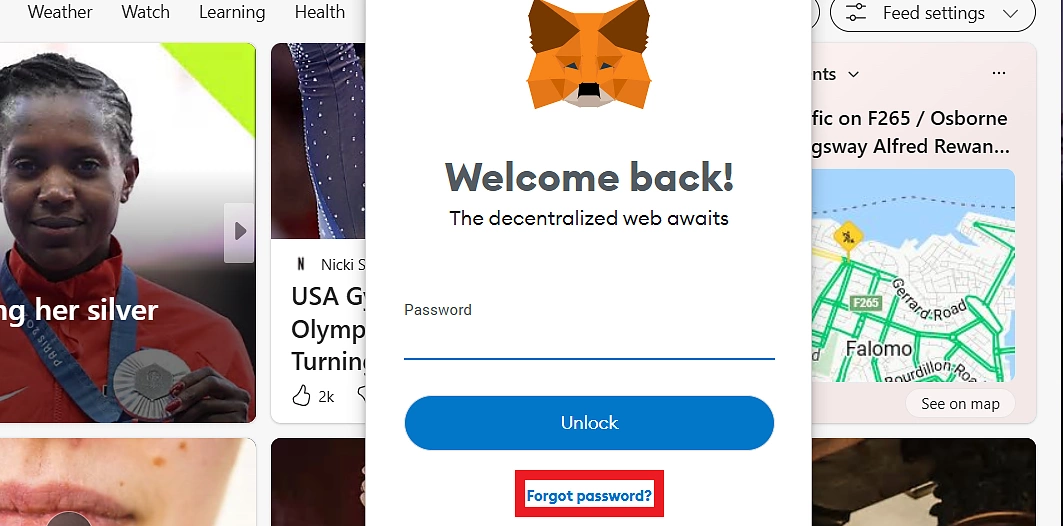
How to Reset Your MetaMask Password
In the event of losing or forgetting your MetaMask password, you will need to reset your password to access your funds.
To reset your wallet password:
-
Click Forgot Password at the login page.
-
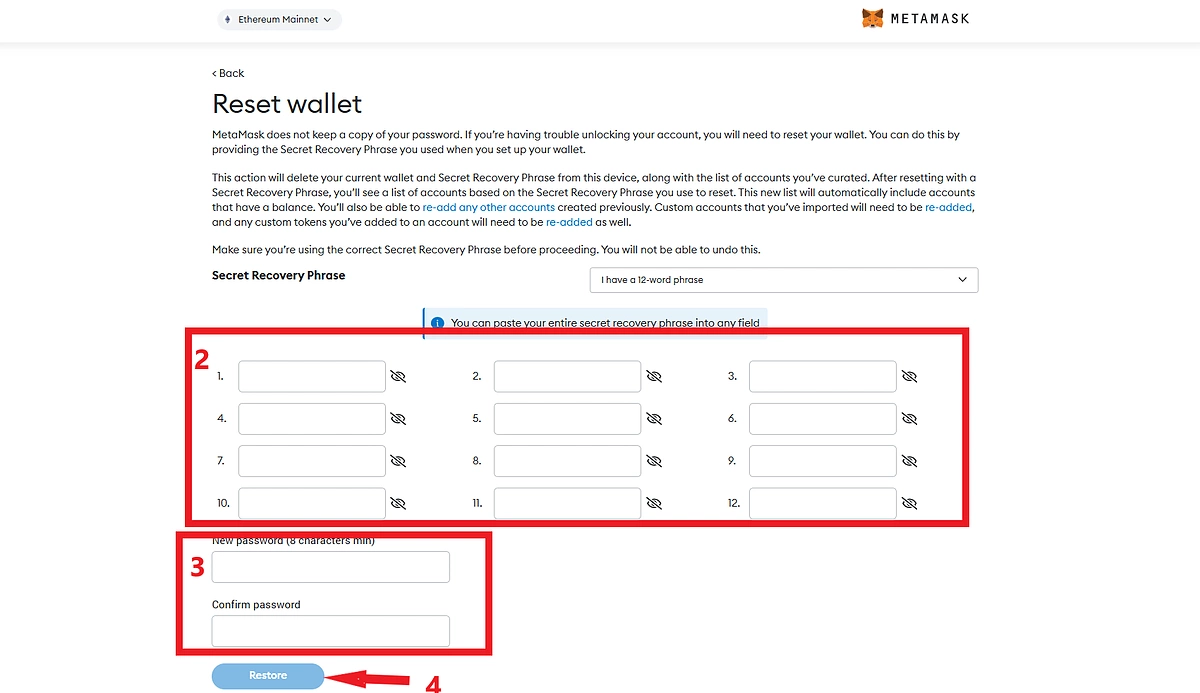
On the next page, you will be required to enter your secret recovery phrase.
-
Enter the words in their correct order.
-
Enter your new password in the relevant fields.
-
Click Restore to complete the process.
Are There Any Fees to Use MetaMask?
The only fee that you will have to pay is the gas fee, which you have to pay for any transaction on any network. So technically, there is no fee to use MetaMask. Gas is the fee needed to execute any transaction on Ethereum and its Layer 2s, and is denominated in Gwei, which is one-billionth of an ETH. For transactions on EVM-compatible Layer 1s, you will also need their native coins to pay for gas fees.
There is a 0.875% service fee charged by MetaMask for swaps that are conducted through its platform.
What Kind Of Support Does MetaMask Offer?
MetaMask has a dedicated support center which can be found here.
How Safe Is MetaMask?
When it comes to cryptocurrencies, security is paramount. We’ve all read about the numerous hacks and thefts. And given that cryptocurrencies are still such an unregulated space, there is little to no recourse for the victims. If you want to invest in cryptocurrencies, you should always have security at the top of your mind.
With that being said, there has been no known instance of MetaMask being hacked so far. However, this does not mean your MetaMask account cannot be compromised, for example through classic social engineering methods such as phishing.
Here are simple steps you can take to protect your MetaMask account:
- Log out of your MetaMask account when you’re not using it (when you’re logged in your MetaMask account is considered ‘unlocked’). Staying logged in to your MetaMask account can allow an attacker to view your wallet address, balances, tokens, and transaction history; information that can be used to generate phishing attacks.
- Watch out for suspicious popups and notifications when you’re logged in as this may be a phishing attack. An attacker might generate malicious popups requesting you to sign for incoming transactions, or notify you that your last transaction failed (and then redirect your transaction to their address). Phony notifications or fake MetaMask interface clones can also be used to attempt to get you to unlock your MetaMask.
- Don’t keep large amounts of cryptocurrencies in your MetaMask wallet. Just like with any hot wallet, you should use MetaMask for active trading, investing, or purchasing only. The bulk of your cryptocurrencies should be kept in cold wallets such as the Trezor Model T or Ledger.
- Bonus: Read the top 16 crypto security tips shared by CoinGecko’s co-founder!
Conclusion: MetaMask is Convenient and Easy to Use, but Precautions Should Always be Taken
MetaMask is probably the most convenient and popular way to interact with dApps on the Ethereum network at the moment. It is intuitive and easy to use and even non-technical people new to crypto should have no problems using it. However, it does not come without its risks and you should always take precautions when using it (as you should when it comes to everything in cryptocurrencies). To keep your cryptocurrencies extra safe, you may want to check out the best hardware wallet available in the market.


 Or check it out in the app stores
 Arbitrum
 Avalanche
 Fantom
 Flare
Flare
 Gnosis
 Linea
Linea
 Optimism
 Polygon
 Polygon zkEVM
 Scroll
 Stellar
 Story
Story
 Syscoin
 Telos
Telos
 Xai
Xai


