
A trading bot refers to a set of computer programs designed to execute trades in financial markets automatically, based on pre-defined criteria. These criteria can include market conditions, technical indicators, or any other dataset.
In this guide, we’re going to build a trading bot using the CoinGecko API, designed to capitalize on the top crypto gainers and losers, thus taking advantage of cryptocurrency volatility in either direction.
As always, you’ll find a link to the GitHub repository at the end of the article, allowing you to dive right in and experiment with the tool. Let's read on!
Prerequisites
Before we can start building our trading bot, we need the following tools:
- Python 3.10+
- An IDE
- A CoinGecko API Key
- A Binance API Key
Step 1. Generate API Keys
CoinGecko API
To obtain a CoinGecko API key, head over to the Developer’s Dashboard and click on +Add New Key in the top right corner. Follow this guide on how to generate and set up your API key.
For this bot, we’ll be using CoinGecko’s Top Gainers & Losers endpoint, available on the Analyst tier and above. Alternatively, you can use the Coins List with Market Data endpoint, which is accessible for free on the Demo plan. You may need to do some additional sorting and filtering yourself, but it’s a viable free alternative.

Binance API
Binance has relatively large number of available cryptocurrencies and a robust trading API making it a good choice for our bot. If you prefer to use a different exchange, you’re welcome to do so, but keep in mind that you’ll need to rewrite the exchange service, as this guide uses a Binance API wrapper.
Head over to your account and find the API Management setting under your profile:
Under API Management, hit Create API, choose System Generated and then hit next. Once you’ve completed the security checks, you should see something like this:
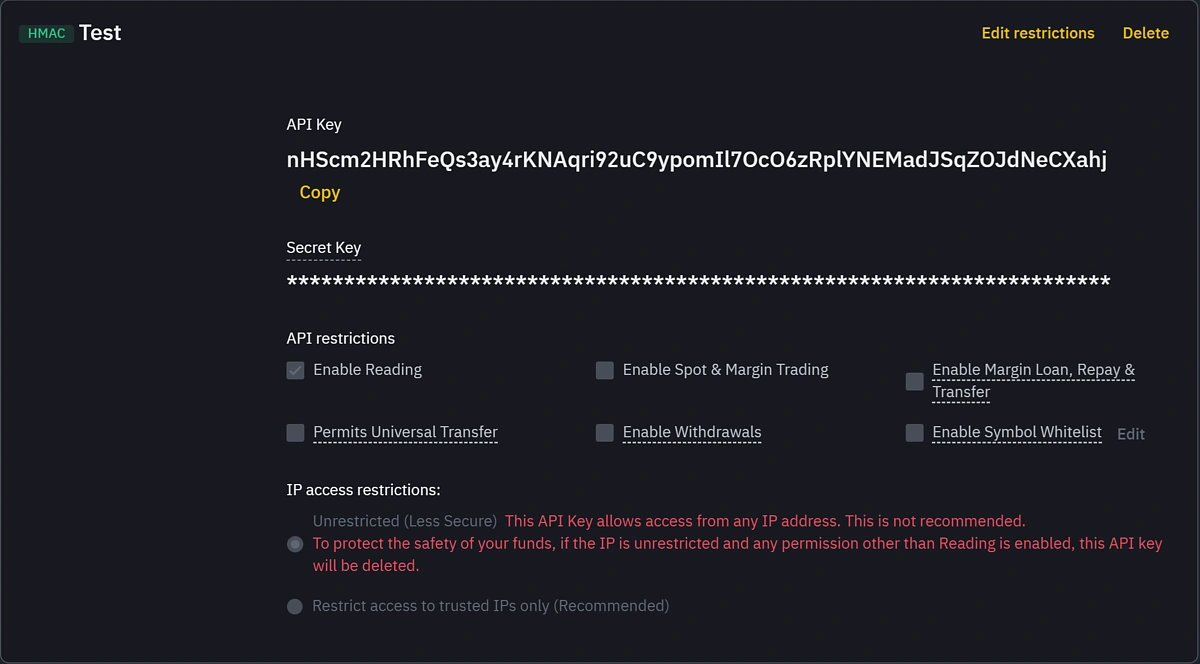
Go ahead and save your API Key and Secret Key for now, as this is the only time Binance will display the Secret Key. If you’ve refreshed the page before saving it, simply delete this Key and create another one.
With your API credentials saved, it’s time to give your key the correct API restrictions. This tells your key what it can and cannot do and it’s important to only give the minimum amount of permissions necessary for the bot to run.
Since we want our bot to place trades on our behalf, hit Edit Restrictions and tick Enable Spot & Margin Trading. This is the only required permission alongside Enable Reading, so avoid ticking dangerous permissions such as Enable Withdrawals.
For additional security, it’s best to restrict the scope of the API Key to your IP Address only. Under IP access restrictions select Restrict access to trusted IPs only and paste in your IP address.
Step 2. Configure your Environment
Let’s go ahead and configure our Python application. We’ll start by creating a virtual environment and installing all the project dependencies.
Installing requirements
In an empty directory, go ahead and run the following commands:
With your virtual environment activated, go ahead and install the following requirements. The easiest way to do this is by copying the file below to your root directory in a file called requirements.txt and then running pip install -r requirements.txt.
Create the project structure
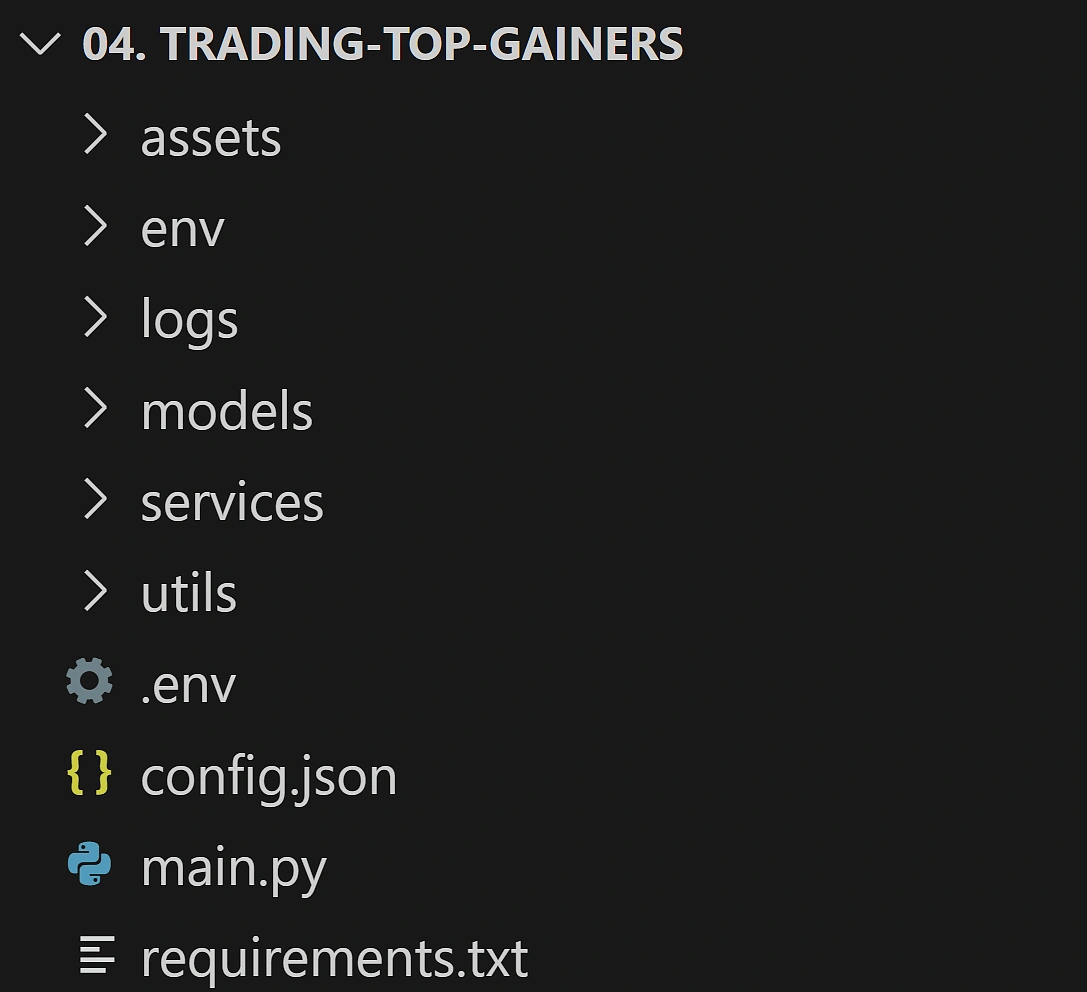
Go ahead and create the directory structure for your project. Your initial setup should look like this:
Define Credentials and Config Settings
Inside your empty .env file go ahead and drop your CoinGecko and Binance API keys in the following variables:
We’ll use these variables to safely import our API credentials into our application later. Now let’s configure our bot settings. Our trading bot will place orders based on the instructions we give it in config.json.
Here is where we’re going to define options such as the amount it should spend per trade, as well as other settings. Let’s define the following settings inside config.json:
For what each of the options mean, see the breakdown below (feel free to skip ahead for now and revisit this section just before running your bot).
- amount: The amount the bot will spend on each trade, specified in the vs_currency. For instance, if vs_currency is set to USDT, the bot will place trades worth 20 USDT for each asset.
- stop_loss: The percentage at which the bot will close a trade if the price drops to avoid further losses (i.e: 10 for a 10% loss).
- take_profit: The percentage at which the bot will close a trade to lock in gains.
- bot_frequency_in_seconds: How often the bot will check for new trading opportunities, in seconds.
- vs_currency: The currency the bot will use for trading.
- number_of_assets: The maximum number of top assets the bot will buy.
- mode: set to "GAINING" to trade top gainers or "LOSING" to focus on top losers.
Step 3. Build Utilities
In this bot’s context, utilities are a set of helper functions that help us load our API Keys, Configuration, and define a logger.
Inside the utils directory, let’s start by creating an empty load_env.py file. Next, let’s define variables for our credentials:
We can now simply import these 3 variables in other parts for our code, to safely get access to our API Keys.
Inside the utils directory, create another empty file called load_config.py. Inside this file, we’re going to define a function called load_config() that returns an object of type Config.
Don’t worry if the IDE warns that the Config object doesn’t exist, we’ll define this in the next step, after configuring our logger.
Next, go ahead and create another file called logger.py, under the same utils directory. Here, we will configure our application logger as follows:
The configuration above will save our logs to the following file format: 2025-01-30_log.log. This will generate a new log file every day. Another setting to keep in mind is the log level. To enable lower severity logging, you may set this to logging.DEBUG - however, bear in mind that this option is quite noisy.
Step 4. Define Models/Objects
This is where we define the shape of the objects that we’ll be working with throughout our application.
Config Object
Inside the models directory, create a new file called config.py. Inside, we define a Config class.
Note the @dataclass decorator - this simplifies the process of creating classes that are primarily used to store data and reducing the amount of boilerplate code that we have to write.
We’re also using an external library called JSONWizard class, which makes it easy to serialize and deserialize JSON data. It also enables dot notation in our code and type hints in our IDE.
Currencies Enum
Next, let’s create a currencies.py file. When requesting coin data from CoinGecko, we need to specify the vs_currency parameter, which determines the currency in which prices and other data are returned.
This is sufficient for our use case since we’re only going to be working with USD, however for more complex requirements, you may call the CoinGecko API's Supported Currencies List endpoint for a complete list of supported currencies and save the response.
Gainers and Losers Object
In the same models directory, let’s define the shape of the GainersAndLosers object from the CoinGecko API response inside a new file called currency_performance.py. CoinGecko’s Top Gainers and Losers endpoint returns an object that consists of two main child objects: top_gainers and top_losers.
Each category contains a list of cryptocurrencies that have either gained or lost the most in terms of price over a given period of time.
To represent this structure, we define two types:
- CurrencyPerformance: This represents the data for each individual cryptocurrency.
- GainersAndLosers: This is a container object that holds two lists - one for the top gainers and one for the top losers. Each list is made up of CurrencyPerformance objects.
Note that for this trading bot we’re working with a 24h price change, so we’ve mapped the property usd_24h_change. This is where the actual percentage change percentage is returned by the API. You will need to rename this variable if you choose to work with a different time frame.
If you opt to use the free endpoint, you will need to change the shape of this object to match the response. That object could look something like this:
Order Object
Finally, let’s define the shape of the exchange’s order response inside a new file called order.py. Upon executing a successful order, the Binance API will return a response of the following shape:
Note that each order has an object called fills of type List[Fill]. This is because an order may take multiple fills to complete, depending on the size of the order and the available liquidity in the orderbook.
Step 5. Build Services
Services are the parts of our code responsible for fetching data, executing and saving trades. For this bot, our services are comprised of 3 components:
- The CoinGecko service: responsible for fetching the top gainers and losers.
- The Exchange service: responsible for placing orders.
- The Saving Service: responsible for saving our trades and managing our portfolio locally in a .json file.
CoinGecko Service
Under the services directory, create a new file called coingecko_service.py. The CoinGecko service needs to do two things: fetch our top gainers and losers, and return a list of available vs_currencies.
Exchange Service
Go ahead and create an exchange_service.py file under services. Our exchange service should be able to: place buy and sell orders on our behalf, and fetch the current price of any cryptocurrency on the exchange, so let’s go ahead and build it:
One thing to note is we’re using the python-binance library to interact with the Binance API. This saves us from having to write our own wrapper.
Another thing to bear in mind is the vs_currency parameter on the buy and sell methods. We’ve named it the same as CoinGecko’s own parameter for consistency, however this refers to the base asset that the exchange itself supports, not CoinGecko. For instance, most of Binance’s pairs are in USDT but this is not a value that CoinGecko’s API returns.
Finally, the reason behind having a method that fetches the current price for a coin, is to help us manage our exit strategy. We’ll use it in order to calculate the current stop loss and take profit for assets the bot is holding.
Saving Service
This service should be able to write to, read from, local JSON files to help us save and manage our bot portofolio and trade history. Create a new file called saving_service.py, and let’s define a SavingService class and its methods:
With the final service out of the way, it’s time to build our core bot logic in our main executable file.
Step 6. Create the main executable file and bot logic
Inside main.py, let’s start by importing all the necessary requirements and initializing our services:
We’ve also added a live trading warning that will pop up on the console, giving us 10 seconds to change our mind.
Now let’s define our main function, this is where the core logic of our bot lives.
The bot starts by checking the configured mode (either "GAINING" or "LOSING"). Based on this setting, it will trade either the top gaining or top losing assets.
Next, the bot selects the top assets based on the number specified in the configuration (config.number_of_assets). For instance, if this number is set to 5, the bot will only trade the top 5 assets returned.
The bot then attempts to purchase each selected asset using the configured amount and currency. If the purchase is successful, the order is logged in both portfolio.json and trades.json for future reference. The reason for saving buys in 2 separate files is because trades represent a historical view of all orders placed, while the portfolio only contains assets that the bot holds. The files are available under the assets directory and are automatically created.
Next, the bot monitors the performance of assets in the portfolio. It checks the current price against the original purchase price and calculates the profit or loss percentage. If the price change exceeds the configured take-profit or stop-loss thresholds, the bot triggers a sell order.
The sell logic also accounts for transaction fees, deducting them from the sale amount before executing the trade. Once the sell is completed, the order is removed from the portfolio and saved in the trades for historical tracking.
To run this logic on a loop, we just need to call the main() function inside a loop, and add our sleep timer from the bot’s configuration.
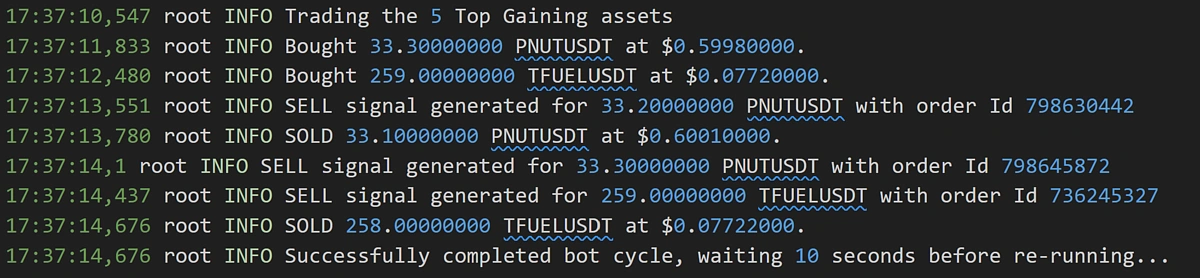
All that’s left to do is run the bot and monitor the logs! A healthy log should look like this:
In case you get an error like the one below:
Timestamp for this request was 1000ms ahead of the server's time.
Simply synchronize your device’s time under the time and date settings.
Considerations & Conclusion
Currently, the take profit and stop loss logic is executed in the same thread as the buy logic. This setup means that stop loss and take profit checks are only conducted once per bot cycle, rather than being continuously monitored. For example, if the bot is configured to trade top gaining coins once a day, it will only evaluate take profit and stop loss conditions once per day. This delay could lead to missed opportunities in volatile markets.
To address this limitation, the bot's take profit, stop loss and sell logic could be comved to a separate thread. This would decouple it from the buy logic, allowing them to run independently and respond more swiftly to market changes.
Additionally, it's worth noting that the bot currently lacks a test mode, meaning it can only operate in live trading.
Finally, always ensure your config.json is tailored to a trading strategy that aligns with your goals and risk tolerance. As with any trading tool, practice caution and trade responsibly.
If you enjoyed this article, be sure to check out this guide on how to build a crypto arbitrage bot.
```


 Or check it out in the app stores

