How to Add Avalanche Network to MetaMask
- Sign into MetaMask and click the network dropdown menu on the top left of the screen
- Click Add network
- Add Avalanche Network C-Chain from the list of popular custom networks.
This article was updated in January 2024 to reflect updated ways to add Avalanche C-Chain to MetaMask by the CoinGecko team.
Unlike other cross-chain projects, Avalanche runs two chains: Avalanche X-chain and Avalanche C-chain. The Avalanche X-chain is only used to receive and send Avalanche tokens (AVAX) and cannot be used on Web3 platforms or added to Web3 wallets like MetaMask. The X-chain can only be accessed from the Avalanche wallet.
The Avalanche C-chain can be added on MetaMask used across DeFi and other decentralized application platforms.
Adding Avalanche to MetaMask Directly
You can add Avalanche to MetaMask directly from a preset list of popular custom networks.
-
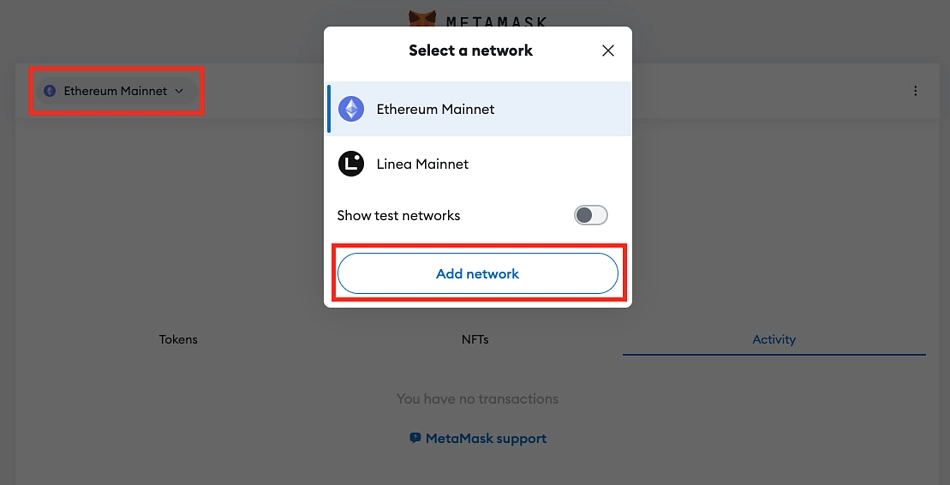
Sign into MetaMask and click the network dropdown on the top left of your screen.
-
From the pop-up window, click Add network.
-
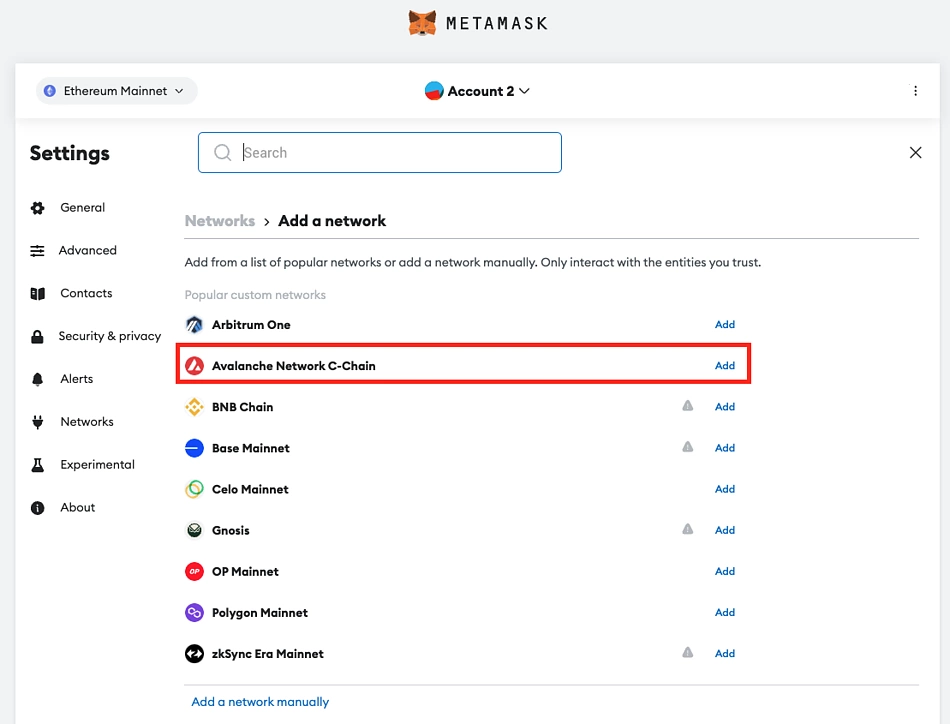
From the list of popular custom networks, add Avalanche Network C-Chain.
-
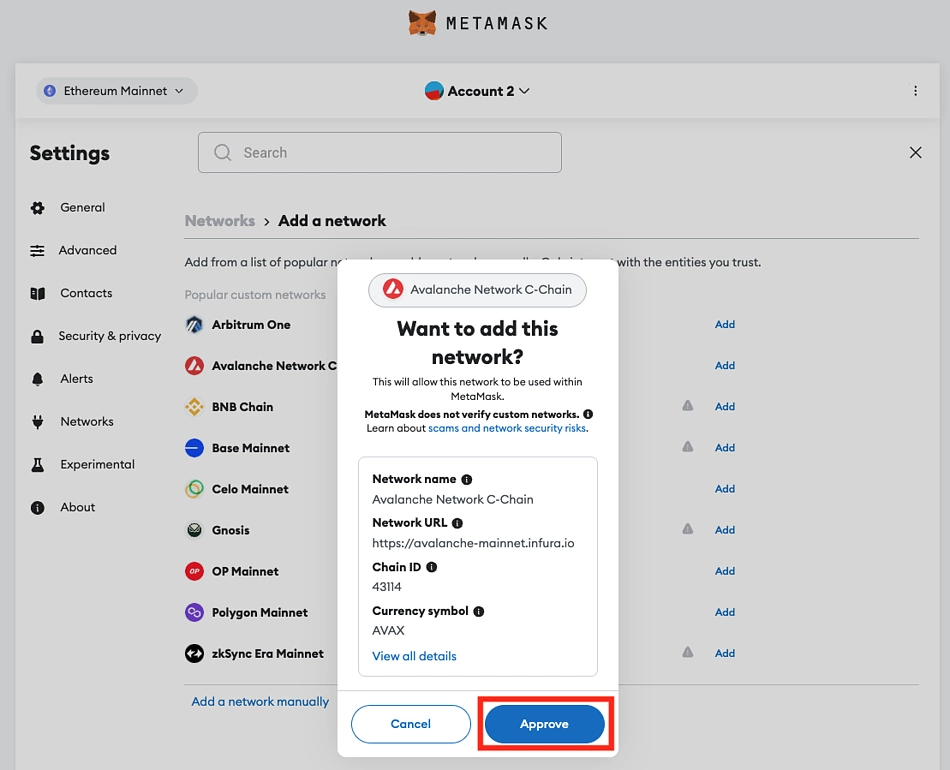
Approve the prompt from your MetaMask, and you can now access the Avalanche Network C-Chain on your MetaMask wallet.
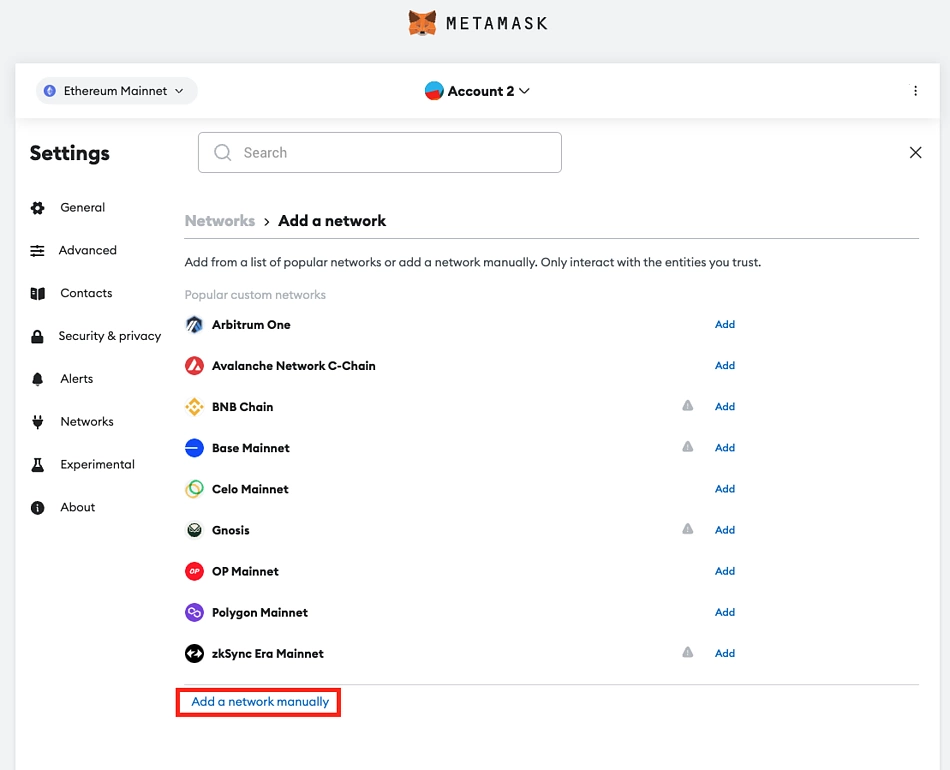
Adding Avalanche to MetaMask Manually
You can also add Avalanche Network C-Chain to MetaMask by entering the chain's RPC details.
-
Sign into your MetaMask and click the network dropdown menu on the top left of the screen.
-
On the pop-up window that displays network selection, click Add network.

-
Click Add a network manually at the bottom of the page.
-
Copy and paste the network details into the form and click Save.
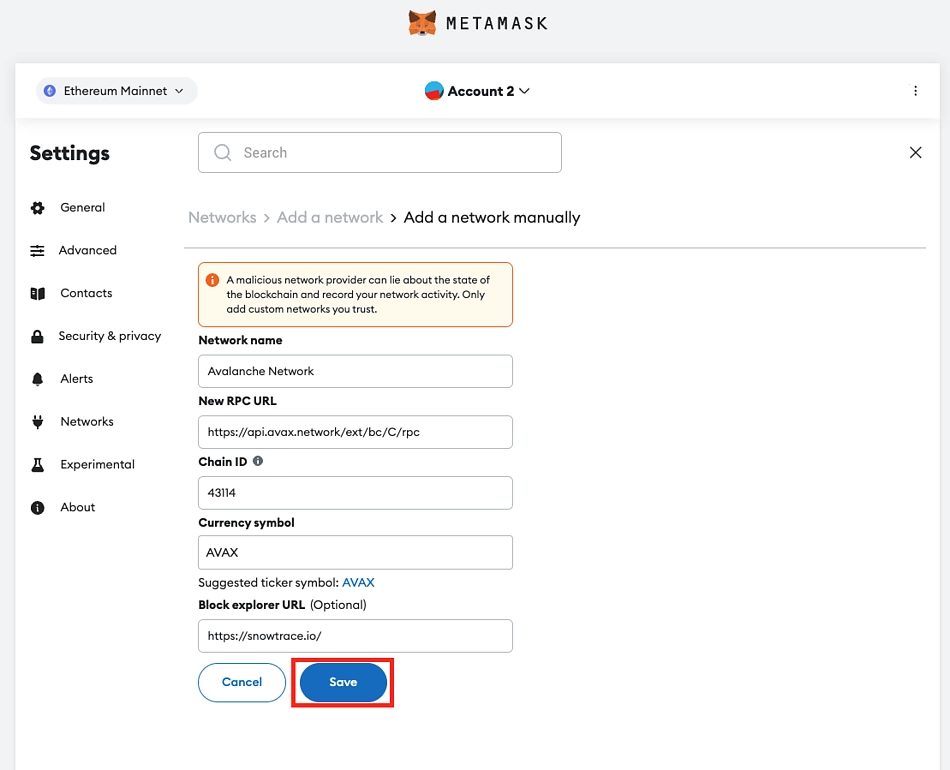
Your MetaMask wallet is now connected to the Avalanche Network C-Chain.
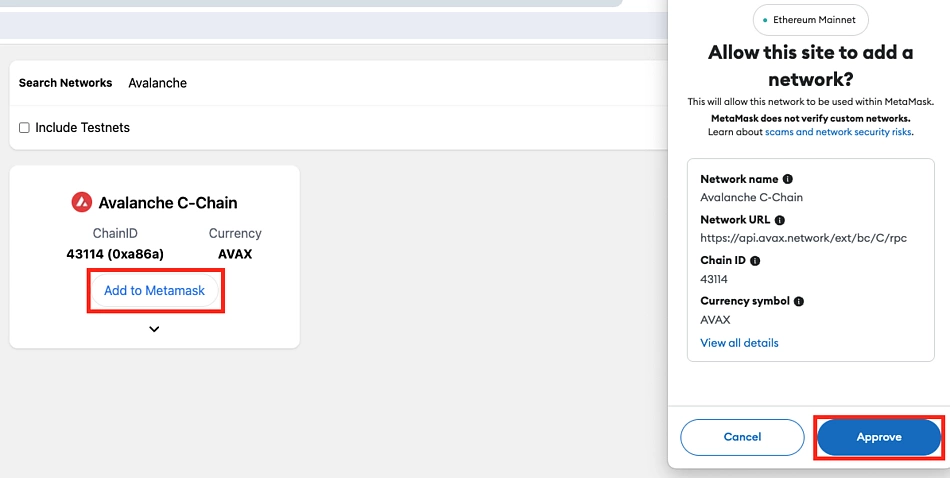
Add Avalanche to MetaMask With ChainList
You can also use ChainList, a directory of EVM networks, to connect your MetaMask to any supported chain.
-
Visit https://chainlist.org/.
-
Search Networks for ‘Avalanche’.
-
Click Add to MetaMask and approve the prompt from your MetaMask.
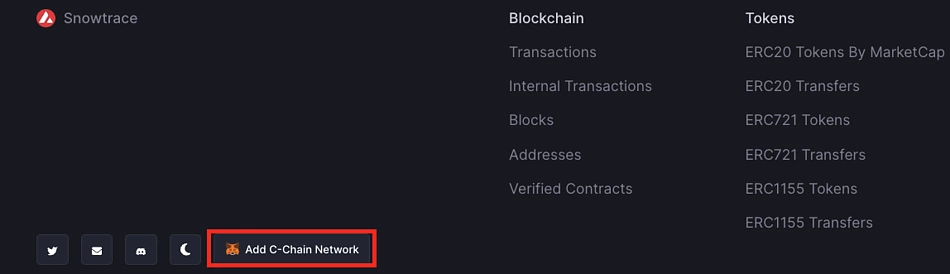
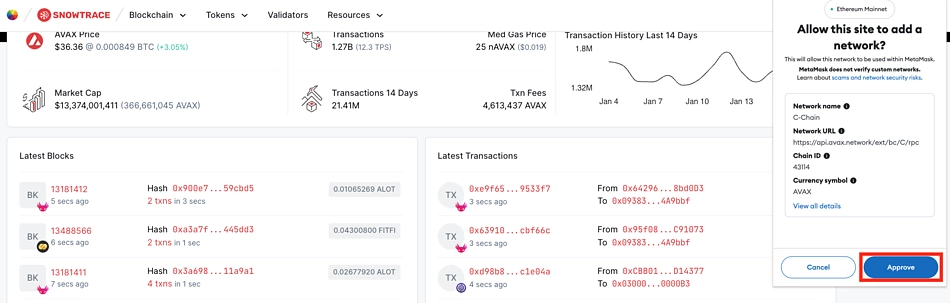
Adding Avalanche to MetaMask Through Snowtrace
You can also add the Avalanche C-Chain network to your MetaMask wallet is via the Avalanche network explorer.
-
Visit https://snowtrace.io/
-
Scroll to the bottom of the page and click the Add C-Chain Network button on the page footer.
-
Verify the network details, and approve the permissions on MetaMask.
How to Transfer AVAX to MetaMask
AVAX is the main token of Avalanche network, just like ether (ETH) on the Ethereum Mainnet. Transacting on Avalanche network is easy, with the most common complication being the network selection.
To send AVAX tokens from an exchange to your MetaMask wallet, ensure you copied your wallet address correctly, and select the Avalanche C-chain as the withdrawal network.


Joel is deeply interested in the technologies behind cryptocurrencies and blockchain networks. In his over 7 years of involvement in the space, he helps startups build a stronger internet presence through written content. He is the founder of CryptocurrencyScripts. Follow the author on Twitter @agboifesinachi


 Or check it out in the app stores